

Before we dive into the setup, let's get a real feel for what Google Tag Manager actually is and why it's such a game-changer. I like to think of GTM as the master remote control for all the tracking scripts on your website. It gives you the power to add, edit, and remove them without having to chase down a developer for every little change.
Getting to Grips With Your GTM Toolkit

At its heart, Google Tag Manager is about freeing you from the headache of manually adding individual tracking codes directly into your website’s source code. Instead of juggling separate snippets for Google Analytics, your advertising pixels, and other marketing tools, GTM bundles them all into one neat package. This isn't just about being tidy; it's a fundamental part of modern marketing and a crucial element of effective website conversion optimization.
Here in the UK, GTM's popularity is tied directly to the rise of Google Analytics 4. With around 400,000 websites in the UK using GA4, we're the second-largest user base in the world. What’s really telling is that about 98.1% of all GTM users globally also have Google Analytics installed. That stat alone shows you just how intertwined these tools are for gathering quality data.
To really get the hang of setting up Google Tag Manager, you first need to understand its three core building blocks. Once you get these, everything else will click into place.
The Core Components of GTM
Mastering GTM really comes down to understanding how its three main parts—Tags, Triggers, and Variables—work together. You can almost think of it as creating simple "if this, then that" rules for your website’s tracking.
Let's break them down. To give you a clearer picture, here’s a quick table summarising how these components function.
GTM Core Components At a Glance
| Component | What It Does | A Practical Example |
|---|---|---|
| Tags | The actual piece of code or tracking script you want to run on your website. This is the "what". | A Google Analytics 4 (GA4) tag, a Meta Pixel, or a LinkedIn Insight Tag. |
| Triggers | The rule that tells a tag when to fire. It’s the specific condition that must be met. This is the "when". | A user clicks a specific button, views a certain page, or submits a contact form. |
| Variables | A placeholder for a value that might change. It provides extra detail for your tags and triggers. This is the "details". | The price of a product, the name of a downloaded file, or the text on a clicked button. |
See how they connect? These three elements are the foundation of every single tracking setup you'll build.
By combining these, you can create powerful, automated tracking rules. For example, you can tell GTM: "Fire the GA4 'Purchase' Tag (the Tag) only when a user lands on our 'thank-you' page (the Trigger), and make sure to capture the exact order total (the Variable)."
Getting this concept down from the very beginning is the key to building a tracking system that is clean, organised, and ready to grow with your business. To see how this fits into the bigger picture, have a look at our beginner's guide to digital marketing.
Creating Your GTM Account and Container
Alright, let's get our hands dirty and set up your first Google Tag Manager account. The good news is, getting the basic structure in place is pretty straightforward.
First things first, head over to the official Google Tag Manager website and sign in with the Google account you want to use. You'll be greeted with the setup screen right away.

This first screen is where you’ll create the main building blocks of your GTM setup: the Account and the Container.
Naming Your Account and Container
You'll start by creating an Account. Think of the account as the highest-level folder, which usually represents your entire company. If you're an agency, this would be the client's business.
A logical naming convention here will save you a world of headaches later on. Keep the account name simple and recognisable, like your company’s name. For instance, "My Awesome Company Ltd" works perfectly.
Next up is your first Container. This is where the magic happens—it holds all the tags, triggers, and variables for a single website or app. This is where a clear naming system becomes absolutely crucial. I find a format like [Website URL] - [Environment] really helps. So, something like mywebsite.co.uk - Live instantly tells you what you're looking at. This is a lifesaver when you eventually create separate containers for your staging or development sites.
Pro Tip: If you manage multiple client sites, always include the client's name in the container title. A structure like
Client Name - Website.commakes navigating between different projects straightforward and seriously reduces the risk of deploying tags to the wrong site. I’ve seen that happen, and it’s not pretty.
Once you’ve named your container, you need to tell GTM where it’s going to be used. This choice dictates how GTM will work.
- Web: This is the one you'll need for tracking standard websites on desktop and mobile browsers.
- iOS/Android: Choose these if you're tracking user activity inside a native mobile app.
- Server: This is a more advanced option for moving tracking from the user's browser to a server-side environment to improve performance and data control.
For most people starting out, Web is the one you want. Select it, click "Create," and after you accept the terms of service, GTM will give you the code snippets you need to add to your site. This initial setup is incredibly flexible compared to the old days of manually hard-coding every single tracking tag.
The shift from Universal Analytics to Google Analytics 4 has pretty much made GTM an essential tool for marketers in the UK. Before GA4's event-based model, you often had to get a developer involved for even minor tracking changes. Now, GTM provides the agility needed for modern marketing. If you want to dive deeper, you can learn more about how GA4 has reshaped analytics for UK businesses. Getting this account structure right from the beginning ensures you’re building on a solid, scalable foundation for whatever comes next.
Getting the GTM Snippet onto Your Website
Right, you’ve got your container set up. Now for the most important technical bit: getting the Google Tag Manager code onto your website. This is the bit of magic that connects your site to the GTM dashboard, and its placement is absolutely critical for gathering reliable data.
GTM gives you two separate chunks of code. They work as a team, and each has a specific job and a specific place to live on your site. The main, longer snippet needs to go inside the <head> section of your website’s HTML. The second, smaller <noscript> piece must be placed right after the opening <body> tag.
There's a very good reason for this setup. Placing the main script high up in the <head> means it loads almost instantly. This is vital. You want it to fire as quickly as possible to catch data from visitors who might click away before the page has even finished loading. The <noscript> snippet is a fallback, a safety net for the rare user who has JavaScript turned off in their browser.
This infographic lays out the basic installation process in three clear stages.
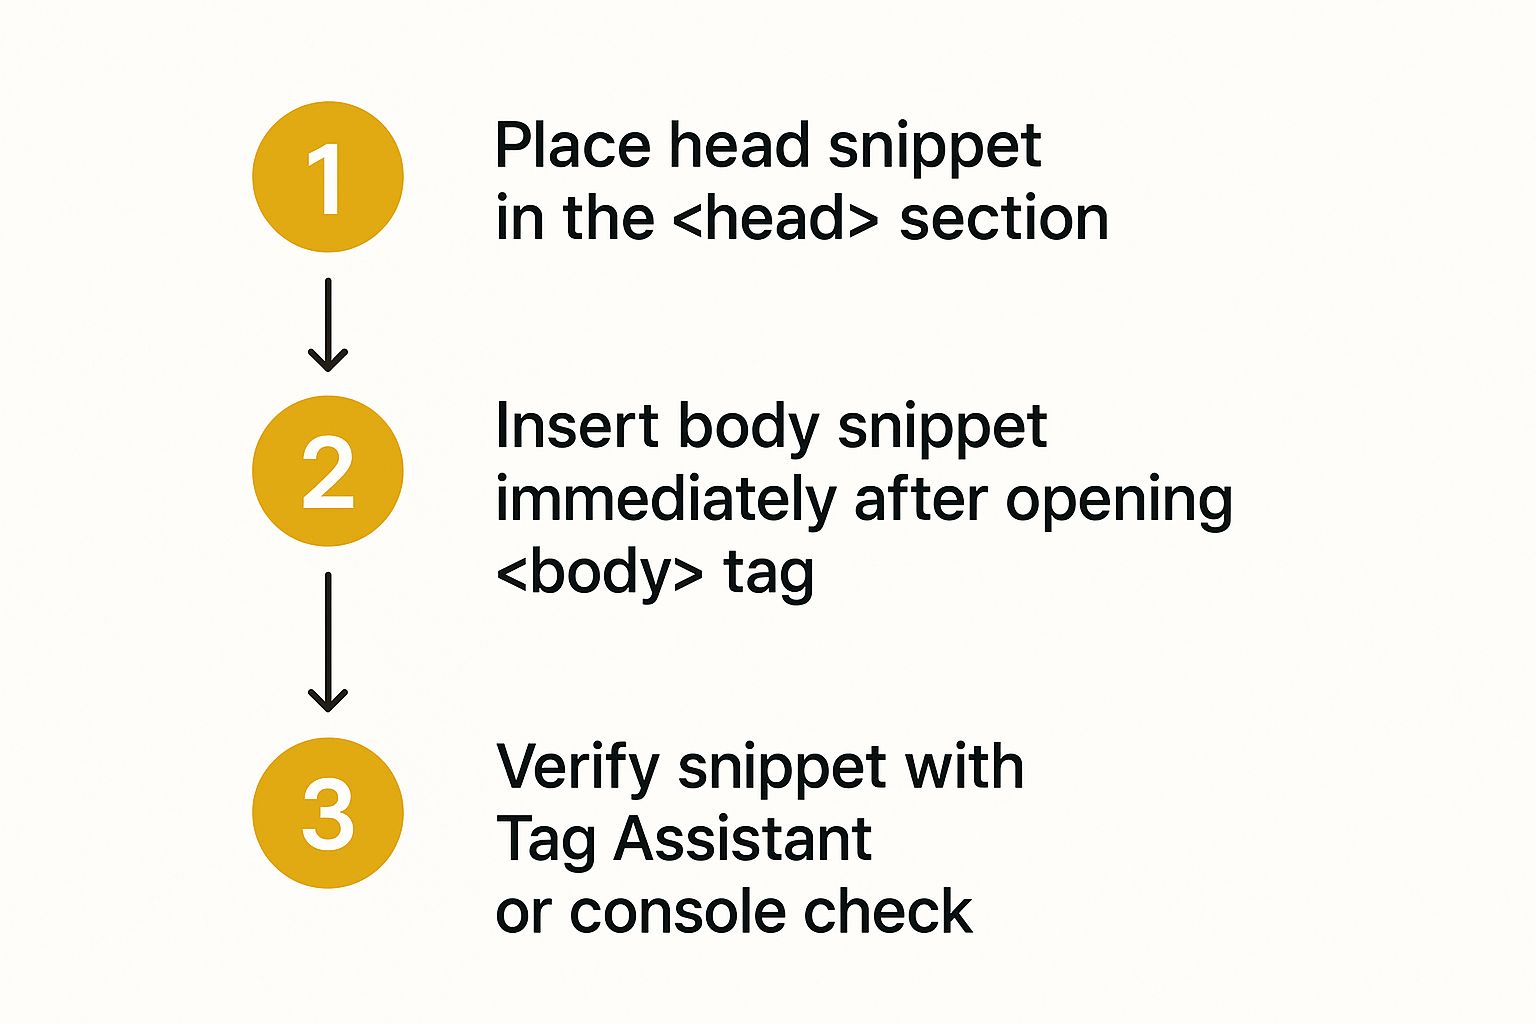
As you can see, the logic is straightforward: get the main code in the head, the fallback in the body, and then double-check everything is working.
How to Install on Different Platforms
The way you add these code snippets will depend entirely on what your website is built with. Let's walk through the most common platforms.
- WordPress Sites: Honestly, the easiest and safest route here is to use a plugin. I always recommend GTM4WP (Google Tag Manager for WordPress) to clients. Instead of fiddling with theme files and risking a mistake, you just install the plugin and pop your GTM Container ID (it looks like
GTM-XXXXXXX) into the settings. The plugin takes care of placing the code in exactly the right spots. - Shopify Stores: This one is a bit more hands-on. You'll need to get comfortable with editing your theme’s code. From your Shopify admin, head to Online Store > Themes. Find your current theme, click Actions > Edit code, and then open the
theme.liquidfile. You’ll paste the<head>snippet just before the closing</head>tag, and the<body>snippet immediately after the opening<body>tag. - Standard HTML Websites: If you or your developer have direct access to the website's source code, this is pretty simple. You’ll just need to edit each page template, making sure to add the two GTM snippets into their correct
<head>and<body>locations as instructed.
A Quick Word of Caution: If you're sending the code snippets to a developer, never use Microsoft Word or Google Docs. These programs often "helpfully" change standard quotation marks (
") into curly ones (“ ”), which will completely break the code. Stick to a plain text editor or a service like Pastebin to be safe.
Once the snippet is live on your site, the job isn't done. You absolutely must verify that it’s working. The best way is to use GTM's built-in Preview Mode or the old-school Google Tag Assistant Legacy Chrome extension. Either tool will show you if your GTM container is firing correctly on your pages. Confirming this now saves a world of headaches later and ensures you’re building all your future tracking on a solid foundation.
Deploying Your First GA4 Tag
Now that the Google Tag Manager snippet is on your site, you’ve essentially laid the groundwork. Think of it like running the electrical wiring through a new house – the power is there, but nothing happens until you start plugging things in. The very first, and most critical, appliance we need to connect is your Google Analytics 4 (GA4) tag.
Getting this first tag right isn't just a box-ticking exercise. It's the core workflow you'll repeat for almost every other tracking code or marketing pixel you add down the line. Nail this process now, and everything else you do in GTM will feel much more intuitive.
A Smart First Step: Creating a Reusable Variable for Your Measurement ID
Before we jump into creating the tag itself, let's do something that will save you a ton of headaches later: create a Constant Variable to hold your GA4 Measurement ID (the one that looks like G-XXXXXXXXXX).
Why take this extra step? Well, imagine you eventually have a dozen different GA4-related tags for tracking various events. If you ever needed to change that Measurement ID, you'd have to go into every single tag and update it manually. By using a variable, you only have to change it in one spot, and the update cascades through your entire setup. It’s a game-changer for keeping things tidy.
Here’s how to set it up:
- Head over to the Variables section in your GTM workspace menu.
- Under the "User-Defined Variables" area, click the New button.
- Give it a really clear name, something like
GA4 - Measurement ID. - Click into the Variable Configuration box and choose Constant from the list of variable types.
- Simply paste your GA4 Measurement ID into the "Value" field.
- Hit Save.
And that’s it. You've now got a single, reliable source for your GA4 ID that you can call upon whenever you need it. This simple habit makes your container infinitely easier to manage.
Building the GA4 Configuration Tag
With our variable ready, we can now build the tag that actually sends data to Google Analytics. This is called the GA4 Configuration tag, and its primary job is to get your analytics tracking up and running on every page of your site.
First, navigate to the Tags section and click New. You'll want to give it an unmistakable name. I always use a consistent naming convention, like GA4 - Pageview - All Pages, so I know exactly what it does at a glance.
Next, click on the Tag Configuration area and choose Google Analytics: GA4 Configuration. You'll see a field for "Measurement ID." Instead of pasting the ID directly, click the little brick icon next to the field – this lets you select a variable. Choose the GA4 - Measurement ID variable you just made.
Setting Up the Page View Trigger
The final piece of this puzzle is the Trigger. This is what tells your tag when to actually fire. For a fundamental GA4 setup, we want it to fire on every single page a user visits.
Just below the tag configuration, click into the Triggering section. GTM comes with a few built-in triggers, and for this, we'll select All Pages. It does exactly what it says on the tin – it fires the tag as soon as GTM loads on any page of your website.
By putting these three pieces together—a reusable variable, a configuration tag, and a simple trigger—you've built your first complete tracking instruction. You’ve told GTM what to do (send data to GA4), where to send it (using your Measurement ID), and when to do it (on every page view).
Save your tag, and you're just about there. This process is the cornerstone of modern analytics, especially for anyone who went through the big GA4 migration.
While this setup gets your core web analytics running, remember that GTM is powerful enough to manage tags for many different marketing channels. For instance, you could later set up tracking to better understand the advantages of email marketing and see how it drives traffic back to your site.
Verifying Your Setup with Preview Mode
https://www.youtube.com/embed/ZU6VEztDo5E
Publishing your container without giving it a test run is a recipe for disaster. It’s like launching a rocket without a single pre-flight check—it might get off the ground, but you've no idea where it's going. That’s exactly what Preview Mode in Google Tag Manager is for. It's your mission control, an absolutely essential tool for debugging.
Think of it as a direct, but temporary, window into your website. It lets you see precisely what your tags, triggers, and variables are doing in a live environment, but one that only you can see. No real visitors will be affected, giving you a safe space to find and fix problems before they mess up your data.
Firing Up the Tag Assistant Debugger
Getting into Preview Mode is straightforward. Look for the big “Preview” button in the top-right corner of your GTM workspace. Clicking it will open up the Tag Assistant in a new browser tab.
You’ll be asked to pop in your website’s URL. Once you hit “Connect,” two things happen: your website opens in another new tab (you’ll spot a little “Connected!” badge in the corner), and the Tag Assistant tab you started on transforms into your live debugging console.
Just remember, this connection is only for your current session. Nothing you do here is pushed live to the public; you're working in your own private sandbox.
Mastering Preview Mode is what separates the pros from the amateurs. You move from a "publish and pray" mentality to a confident, controlled workflow. It's honestly the most important skill for ensuring your tracking is spot-on from the get-go.
Reading the Debug Console
At first glance, the debug console can feel a bit overwhelming, but it’s actually laid out very logically. The column on the left is your event timeline, a running log of everything that happens as you interact with your site.
You’ll see events like "Container Loaded" and "DOM Ready" appear as soon as the page loads. As you click on links, fill out forms, or even just scroll, new events will pop up in this list. This is GTM showing you exactly what it sees.
When you click on any event in the timeline, the main window will show you what happened at that precise moment. Pay close attention to these tabs:
- Tags Fired: This is your success list. It shows every tag that executed correctly for the event you've selected. If your GA4 Pageview tag is listed here, you know it's working.
- Tags Not Fired: Arguably the more useful tab when troubleshooting. It tells you which tags didn't fire and, crucially, why. It will point out the exact condition in your trigger that wasn't met.
- Variables: This tab is a goldmine. It shows you the real-time values of all your variables at the point the event occurred. It’s perfect for double-checking if your "Click Text" variable is capturing the right button label or if your "Form ID" is correct.
Let’s say you click a "Submit" button, but your tag doesn't fire. You'd simply click on the "Click" event in the timeline on the left. Then, look at the "Tags Not Fired" list. GTM will give you a clear reason, like "Trigger condition not met: Click Text does not equal 'Submit'." Instantly, you know you’ve got a typo in your trigger configuration.
Going through this process for every single tag gives you the confidence that everything is wired up correctly before you hit that final publish button.
Publishing Your Container and Moving Forward

So, you've run everything through Preview Mode and you're confident it's all working as it should. Great! Now it's time to go live. This is the final step where your new tags and triggers finally start tracking real user interactions on your site.
To get started, look for the big blue Submit button in the top-right corner of your GTM workspace. Clicking this is what sets the whole process in motion.
Don't Skip the Change Log—Ever
Once you hit submit, you'll land on a new screen. GTM will ask you to provide a Version Name and a Version Description. I can't stress this enough: do not skip this part. This is your internal changelog, and getting into the habit of filling this out properly is what separates the novices from the pros. It will save you a world of pain down the line.
Instead of a vague name like "Update," be specific. Something like "Added GA4 Pageview Tag" or "Configured Contact Form Submission Trigger" is much more useful. Use the description to add even more context.
Why is this so important?
- For Your Team: It creates a crystal-clear history of who changed what, and why. No more guesswork.
- For Your Future Self: Trust me, six months from now, you won't remember the details. A good description means you won't have to waste time trying to figure out your own past work.
- For Easy Fixes: If a new change accidentally breaks something on your site, you can instantly roll back to a previous, working version with a single click.
Think of GTM's version control as your safety net. Every time you publish, you're creating a restore point for your entire setup. It's a powerful feature, but it's only as good as the descriptions you write.
After you've filled in the details, go ahead and click Publish. That’s it! Your Google Tag Manager container is now officially live on your website.
Keeping Your GTM Setup Clean
Google Tag Manager isn't a "set it and forget it" tool. It needs a bit of ongoing care to stay efficient and reliable. It's wise to establish a clear process for adding new tags from day one. This should include managing user permissions to control who can edit and publish changes, keeping your setup secure and well-organised.
Proper GTM management is a cornerstone of any good marketing strategy for small business. It ensures the data you rely on for big decisions is actually accurate. By adopting these best practices now, you're building a solid, scalable tracking foundation that will grow with your business for years.


