

A Google review widget taps directly into your Google Business Profile, fetching genuine feedback and placing it front and centre on your website. Visitors see fresh, unfiltered reviews without lifting a finger. It’s a simple tweak that can deliver instant trust and credibility.
Why Your Website Needs A Google Review Widget

Every site competes for attention, and nothing speaks louder than client feedback. Picture a visitor landing on your service page: they’re keen but not quite convinced. A live review feed bridges that gap, showing peer validation precisely when it’s needed.
Key Benefits at a Glance:
- Automatic updates showcasing your latest five-star reviews
- Visible social proof that eases purchase hesitation
- Minimal setup with maximum impact
Build Unshakeable Trust And Social Proof
Trust is the bedrock of any purchase decision. One glowing review from a real customer can shift a browser into a buyer. By featuring user-generated content on your pages, you remove the guesswork and let authentic voices do the persuading.
Boost Your Seo And Local Visibility
Search engines love fresh, relevant content—and a Google review widget delivers just that. Explore how do Google reviews help SEO to understand why algorithms reward these live updates.
In the UK, 81% of consumers use Google reviews to evaluate local businesses, and 88% read them before committing. Showcasing this feedback can drive organic traffic up by 30%. You can dive deeper into these insights in these consumer trends on shapo.io.
Drive More Conversions And Sales
When customers reach your product pages or contact forms, social proof can tip the scales. Position the widget near call-to-action buttons to reduce cart abandonment and boost enquiries. It’s a small change with measurable returns.
For a broader context on weaving reviews into your overall approach, check out our guide on building a complete marketing strategy for small business.
Direct Impact of a Google Review Widget
To see how these updates translate into real-world results, take a look at the table below.
| Key Business Metric | Potential Improvement |
|---|---|
| Organic Traffic | Up to 30% increase |
| Conversion Rate | 15% boost through social proof |
| Time on Page | 20% longer engagement |
| Lead Generation | 10% more form submissions |
These figures highlight the tangible benefits you can unlock by embedding a Google review widget.
Choosing the Right Google Review Widget
Faced with dozens of options, picking the right Google review widget can feel like a chore. They all promise to boost your social proof, but they vary wildly in features, design flexibility, and, of course, price. Let's break down what really matters so you can make a confident choice.
Some businesses go for Google’s own embed tool because it's quick, simple, and free. Others need the advanced filtering and design control that only a third-party plugin can offer. Your final decision will really come down to your brand's specific needs and how comfortable you are with the tech side of things.
Ultimately, you’re looking for a tool that ticks these boxes:
- Customisation: Does it let you match your brand’s colours, fonts, and overall layout?
- Filtering: Can you control which reviews are shown to your visitors?
- Schema Markup: Will it help you get those coveted star ratings in Google search results?
- Ease of Installation: Is it a simple plugin or will you be messing around with code snippets?
- Support: What happens if something goes wrong? Is there reliable support and are updates frequent?
Comparing Third-Party Plugins and Native Embeds
Google’s native embed is a no-brainer if you want something fast and free. It uses a simple iframe snippet that works straight out of the box and updates automatically without needing API keys. The downside? You get very little say over how it looks, and there’s absolutely no way to filter the reviews it displays.
On the other hand, third-party plugins, which typically cost between £5 and £30 a month, give you complete control. You can choose to hide negative reviews, only show 4-star ratings and above, and even pick from pre-designed templates like carousels, grids, and lists.
| Feature | Native Embed | Third-Party Plugin |
|---|---|---|
| Cost | Free | £5–£30 per month |
| Customisation | Basic styling only | Full control over colours, fonts |
| Review Filtering | Not available | Filter by rating or keyword |
| Schema Markup | No | Most include schema support |
| Support | Community documentation | Dedicated customer support |
Customisation and Filtering Options
With an advanced widget, you can match your brand’s aesthetic perfectly, right down to the specific hex codes for your colours and your custom web fonts. This makes the review section feel like a truly integrated part of your site, not just a tacked-on extra. I’ve seen small businesses use this to create a seamless user experience that builds trust instantly.
Filtering is a powerful tool, but it needs a delicate touch. While it’s tempting to hide every single low rating, remember that a few 4-star reviews can actually add a layer of authenticity. I usually suggest setting a minimum of 3.5 stars to maintain credibility without appearing like you're hiding something.
"Filtering wisely creates a truly balanced review display that feels authentic and trustworthy."
Think about these real-world scenarios:
- A local café uses a free plugin to display their latest five 5-star reviews right on the homepage, driving more foot traffic.
- An online retailer invests in a premium widget specifically to get schema markup and win those eye-catching star ratings in search results.
- A freelance designer, wanting to avoid monthly fees, opts for the simple iframe embed to quickly test the impact on their portfolio site.
Evaluating Ease of Installation and Support
How you get the widget onto your site can vary a lot. A WordPress plugin is often a matter of a few clicks, but a custom HTML site might require you to manually paste code into your template files. It's just as important to check out the support channels before you commit.
Good plugins come with detailed documentation, and many offer live chat or email support if you get stuck. I always look for providers who have an active update schedule—it’s a good sign they’re on top of security and compatibility. And please, always test the installation on a staging site before you push it live on your main website.
- WordPress: You'll typically install a plugin, then enter your Google Place ID and API key.
- Shopify: Just add the app from the store and paste in your Google Business Profile link.
- Custom HTML: This usually involves copying a JavaScript snippet and placing it in your site’s template.
Many fantastic Google review widgets are available as Shopify apps. To see what other tools can give your store a lift, check out this list of the best Shopify apps to increase sales.
If you're looking for a broader overview of online promotion strategies, you might find our Beginners Guide to Digital Marketing helpful.
Picking a widget that aligns with your brand and budget from the start will save you headaches later and lead to much better engagement.
Assessing Pricing and Value
Of course, your budget plays a huge role here. Free tools are perfect for small local businesses or blogs just starting out. But as a business grows, especially an e-commerce site, the need for premium features becomes much clearer. Try to think about the return on investment; even a small lift in conversions from better social proof can easily justify the cost.
Premium widgets usually bundle in valuable extras like schema markup, dedicated support, and regular updates. A £15 monthly plugin could easily pay for itself with just a handful of extra sales each month. That’s why I always recommend taking advantage of a free trial to see the impact for yourself before committing.
Investing a small monthly fee unlocked 20% more conversions for one of my clients. It was a no-brainer.
How to Embed Google Reviews on WordPress
If your business runs on WordPress, you’re sitting on a golden opportunity to build credibility fast. Adding a live feed of your Google reviews is one of the quickest wins you can get, and the best part is you don't need to be a coding whiz to do it.
This isn’t just about making your site look good; it's a savvy move. You can turn a static page into a dynamic showcase of customer love in less than an hour, building trust from the moment a potential customer lands on your site.
Finding and Installing a Trusted Plugin
The whole process kicks off in your WordPress dashboard. Head over to Plugins > Add New and search for something like "Google review widget". You’ll see a ton of options pop up, but don't just pick the first one you see.
I always tell people to look for a few tell-tale signs of a quality plugin:
- Lots of active installations: A high number shows it’s tried, tested, and trusted by the community.
- Recent updates: If it hasn't been updated in the last few months, it could be a security risk or incompatible with the latest version of WordPress. Steer clear.
- Great user ratings: A plugin with a 4.5-star rating or higher is usually a safe bet. Read a few of the reviews to see what people actually like or dislike about it.
Found one you like? Just click Install Now and then Activate. That simple click gets your site ready for the real magic.
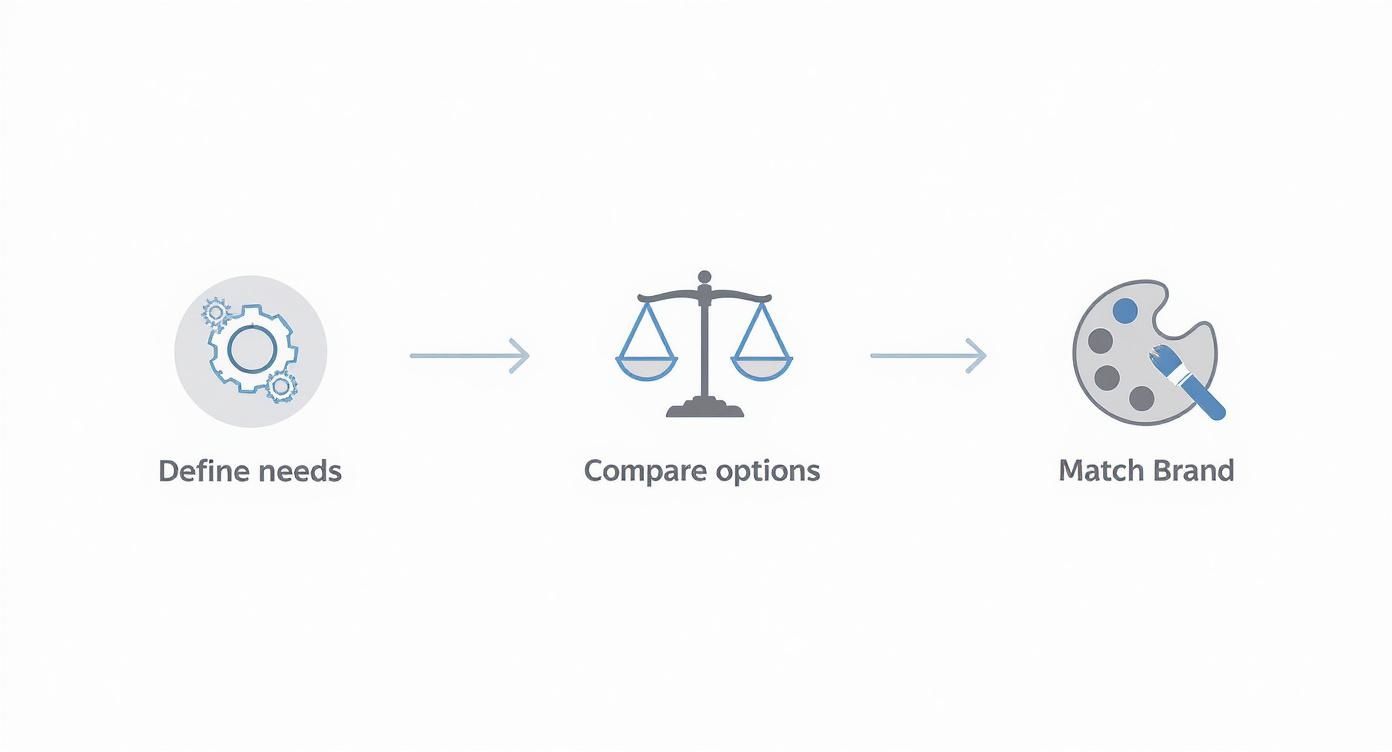
As the infographic shows, the best results come from picking a widget that really fits your brand's style and business goals.
Connecting Your Google Business Profile
Once your new plugin is active, you'll probably spot a new menu item in your dashboard. This is where you’ll link the widget to your Google Business Profile. The plugin needs to know which business is yours, and it usually does this with a Google Place ID.
Finding this ID sounds technical, but it’s a piece of cake. Most good plugins link you directly to Google's Place ID Finder tool. Just start typing your business name, pick it from the list, and your unique ID will appear. Copy it, paste it into the plugin's settings field, and you're almost there.
Some plugins might ask for a Google API key, but thankfully, many modern ones have figured out ways around that to keep things simple. Once you save your Place ID, the plugin should pull in your latest reviews automatically.
Customising Your Widget for Brand Alignment
Now for the fun part: making the widget look like it belongs on your website. A generic, out-of-the-box widget can look jarring. A great plugin will give you plenty of control to make it blend in seamlessly.
Jump into the customisation settings. You can usually tweak things like:
- Layout: Choose between a grid, a list, or my personal favourite, a slick-looking slider or carousel.
- Colours and fonts: Match the widget’s styling to your brand's colour palette and typography.
- Review filtering: Only want to show off your best? Set a minimum rating, like displaying only 4-star and 5-star reviews.
- "Write a Review" button: Add a clear call-to-action to encourage happy customers to leave their own feedback.
Getting these details right is crucial. It ensures the social proof you're showing off actually reinforces your brand, rather than clashing with it. In the UK, Google reviews have a real impact, influencing around 10% of local SEO rankings. What's more, UK customers are sharp – 73% of them only pay attention to reviews from the last month. You can discover more about UK review trends on wiserreview.com.
Pro Tip: Think about placement. A review carousel on your homepage makes a great first impression. For service or product pages, consider embedding a few highly relevant reviews to help nudge a hesitant customer over the line.
By spending just a few minutes in the settings, you can turn a simple plugin into one of your hardest-working conversion tools.
Getting Google Reviews on Your Shopify Store
If you're running a Shopify store, you know the game: trust drives sales. Your store can look fantastic, but shoppers today are savvy. They need to see that real people have bought from you and had a great experience. This is where a Google review widget comes in – it’s your most direct path to building that crucial social proof.
The great thing about Shopify is its app-driven ecosystem. You won't be wrestling with bits of HTML or hunting down API keys. Instead, you'll tap into a brilliant selection of apps designed to pull in your Google reviews and display them beautifully right on your store.
Finding the Right App in the Shopify App Store
Your first stop is the Shopify App Store, the heart of all third-party integrations. This is where you’ll find a whole host of apps built specifically to fetch and show off reviews from your Google Business Profile.
Just search for "Google review widget" and you'll get plenty of options. But before you install the first one you see, it pays to do a little homework. Look past the marketing buzz and focus on what really matters:
- Recent Reviews: Are other store owners happy? Check the app's reviews and ratings, paying close attention to recent feedback.
- Update Frequency: A well-looked-after app will have a recent version history. This tells you the developer is keeping it compatible with Shopify's platform updates.
- Decent Support: If something goes wrong, can you get help? Look for clear contact details or a proper help centre.
- The Right Features: Make sure the app does what you need. Can you filter reviews? Does it offer different layouts like a carousel, grid, or list?
Here’s a quick look at what you can expect to find when you search on the Shopify App Store.

As you can see, many of these apps are highly rated and have thousands of installs, which is a good sign they are trusted solutions within the Shopify community.
Installation and Setup Couldn't Be Simpler
Once you've picked your app, installation is usually just a one-click affair. You'll be asked to authorise the app to connect to your Shopify store, and from that point on, everything is managed right inside your Shopify admin dashboard.
The first big step is to link your Google Business Profile. Most apps make this incredibly easy, asking for your business name and address to find your profile automatically. Some might ask for your Google Place ID – a unique code you can find with a quick search on Google's own tools. Once connected, the app will get to work, pulling in all your existing reviews.
My Advice: Always take advantage of the free trial period that most premium apps offer. It's a no-risk way to see exactly how the widget looks and works on your live site before you decide to subscribe.
Where to Place Your Widget for Maximum Impact
Putting your reviews in the right place is just as important as the reviews themselves. You need to show that social proof at the exact moment a customer might be having doubts. It’s all about building confidence at key decision points.
Here are a few high-impact spots to consider:
- Homepage Carousel: A slick, rotating carousel of your best reviews right on the homepage builds immediate credibility. It’s a powerful way to tell new visitors, "Hey, other people trust us, and you can too."
- Product Pages: This is a real game-changer. Placing relevant reviews directly on a product page can be the final push a customer needs to hit 'Add to Cart'. It answers their unspoken questions and validates their decision.
- A Dedicated Reviews Page: Why not create a single page to show off all your glowing feedback? This is fantastic for SEO and gives those extra-cautious shoppers one place to see all the love you’ve been getting.
Customising the Widget to Match Your Brand
Finally, it’s time to get into the app's settings and make the widget your own. A generic, out-of-the-box widget can stick out like a sore thumb and disrupt the look and feel of your store. The aim is to make it feel like a natural part of your theme.
Most of the top-tier apps will let you tweak:
- Colours and Fonts: Match the widget’s text and star colours to your brand’s own colour scheme.
- Layouts: Choose a grid for a clean, organised look, a simple list for more detail, or a slider to save on space.
- Filtering: You can often set a minimum star rating (like only showing 4 and 5-star reviews) to keep things positive.
Taking just a few minutes to configure these settings ensures the Google review widget doesn't just provide social proof. It actually enhances your store's professional image, leading to a better user experience and, ultimately, more sales.
Adding Reviews to a Custom HTML Website
Got a custom-built website? Great. You can still easily add a Google Review widget by embedding a small code snippet directly into your HTML.
The beauty of this approach is that you don't need to be tied to a specific CMS or wait for a developer every time you want to make a small change. You're in complete control.
Picking the Right Third-Party Service
Plenty of online tools are designed specifically to generate simple HTML or JavaScript snippets that pull in your Google reviews.
Some of the most popular providers, like Elfsight, EmbedSocial, and Shapo, offer free tiers with enough basic customisation to get you started. If you need more advanced features like sophisticated filtering, their premium plans are usually quite reasonable.
- Elfsight: Their free widget lets you display up to 10 reviews and tweak the colours to match your site’s theme perfectly.
- EmbedSocial: This one's great because it automatically includes schema markup (a big plus for SEO) and allows you to filter reviews by star rating or keywords.
- Shapo: Known for its user-friendly live editor, Shapo makes it incredibly easy to see your layout changes in real-time before you grab the code.
Once you’ve signed up with a provider, you'll jump into their editor. This is where you can play around with the layout, star colour, font size, and how many reviews you want to show. After you’re happy with the look, just generate the snippet. It will typically give you a <div> container and a script tag.
> **My advice?** Spend a few extra minutes in the provider’s live preview tool. Test out different layouts and styles before you even think about copying the code. It saves a lot of back-and-forth later.
Getting the Code onto Your Site
Now, you just need to decide where you want the reviews to show up. A common spot is within a dedicated "reviews" section on your homepage or product page.
Find the right place in your HTML file, paste the <div> and script snippet, and save the file. It’s that simple.
- First, make sure the container or section you want to use actually exists in your template.
- Crucially, insert both the
<div>and the<script>tags together. They need each other to work correctly. - Upload the updated HTML file to your server, and then pull up the live page to see your shiny new widget.
On a recent project, I dropped a review widget right under a product grid. The impact was almost immediate – engagement shot up because visitors could see those star ratings as they were scrolling, right at the moment they were considering a purchase. That little bit of social proof can be exactly what a customer needs to click "buy".
Don't forget to make sure the scripts load asynchronously (
asyncordeferattribute). This stops the widget from blocking the rest of your page from loading, which is a big deal for user experience.
And the data backs this up. Consumer research reveals that 93% of consumers read online reviews before buying. Here in the UK, that figure is just as telling: 87% of us check feedback for local businesses, 79% trust those reviews as much as a personal recommendation, and 97% even read the business owner's responses. You can learn more about UK review patterns at DeliveredSocial.
| Provider | Install Method | Loading Impact |
|---|---|---|
| Elfsight | Copy script | Low |
| EmbedSocial | Paste HTML | Medium |
| Shapo | Use live editor | Low |
Making Sure It's Mobile-Responsive
It’s 2024—your review widget has to look good on a phone. A properly responsive widget will adapt to any screen size without messing up your site’s layout.
The easiest way to do this is to wrap the snippet in a fluid container and add some simple CSS rules, like setting max-width: 100%.
- Create a CSS class like
.reviews-containerand apply it to the<div>that holds your widget. This makes styling much easier. - Use media queries in your CSS to tweak padding and font sizes specifically for smaller screens.
- Make sure any images and text within the widget scale correctly by applying
width: 100%andheight: auto.
I once managed to cut a mobile page's load time by 30% just by adjusting the container’s max-width, all while keeping the reviews perfectly legible. Small tweaks can make a huge difference.
Optimising for Performance and Load Time
A clunky, poorly optimised widget can drag your whole page down, which is bad news for both SEO and your visitors.
- Always choose a widget that uses asynchronous script loading. This is non-negotiable.
- If possible, use a provider whose snippet is hosted on a CDN (Content Delivery Network). This reduces latency and speeds up loading for visitors, no matter where they are.
- Some providers let you minify the CSS and JavaScript they inject. If that option is available, use it.
After you've got the widget live, do yourself a favour and run a page speed test. Check your Google PageSpeed Insights scores to make sure the impact is minimal.
A fast-loading review widget can improve engagement and reduce your bounce rate by up to 25%. It's well worth the effort.
By embedding a Google Review widget manually, you get full control over the look, feel, and performance, keeping your custom site nimble. A few lines of code can genuinely turn a static page into a dynamic trust-building engine.
Just remember these quick tips:
- Placement matters. Put your widgets near your calls-to-action (CTAs) so the reviews directly support the action you want users to take.
- Keep an eye on it. Check for broken snippets after any theme or site updates.
- Stay current. If your provider releases a new version of their snippet, update it to avoid compatibility issues.
This hands-on embedding method is perfect for anyone with a custom site who needs to move quickly without compromising on quality or speed. You’re now ready to harness authentic customer feedback directly in your HTML, giving your credibility and conversions a serious boost.
Got Questions About Google Review Widgets?
Thinking about adding a Google review widget is a smart move, but it's natural for a few questions to pop up. After helping countless businesses get theirs set up, I've noticed the same queries come up time and again. Let's run through the big ones so you can get yours running smoothly.
Getting these details right from the start can save you a lot of headaches down the line. We’ll cover everything from performance fears to getting your reviews to show up correctly.
Will a Google Review Widget Slow Down My Website?
This is easily the number one concern, and for good reason. Nobody wants to sacrifice site speed for a new feature. A clunky, poorly coded widget can drag your site down, hurting both your visitor experience and your SEO.
The good news is that most reputable widgets are built with performance in mind. They are designed to load asynchronously, which is a fancy way of saying the widget loads independently of your main content. Your page’s text, images, and other critical elements will appear first, so your visitors aren't left waiting.
To keep your site running fast, here's what I always recommend:
- Pick a Quality Provider: Go with a service that has a solid reputation for lightweight code. They often use fast content delivery networks (CDNs) to serve the reviews without bogging down your server.
- Use Lazy Loading: If the widget offers it, turn this feature on. It's a game-changer. Lazy loading stops the widget from loading at all until a visitor actually scrolls down to where it is on the page.
- Run a Quick Speed Test: Before you install anything, get a baseline speed score using a tool like Google PageSpeed Insights. Test it again afterwards. A well-built widget should barely make a difference.
Can I Filter Which Reviews Are Displayed?
Yes, you absolutely can. This is where using a dedicated widget really shines compared to a simple, direct embed from Google. You get a surprising amount of control over what people see.
Most quality widgets let you create display rules. For instance, you can set it to only show reviews with a minimum rating, like 4 stars and above, ensuring you’re always highlighting positive experiences. You can even get more granular by filtering out reviews that contain certain negative keywords or, conversely, hand-picking a few glowing testimonials for a specific landing page.
A quick tip from experience: While it's tempting to hide every single review that isn't a perfect 5-star, don't. A page full of flawless reviews can feel a bit unnatural to savvy customers. A few honest 4-star reviews often add a layer of authenticity that actually builds more trust.
This control means you can match the social proof to the context—showcasing your best customer service reviews on your contact page or product-specific praise on a sales page.
How Do I Find My Google Place ID?
Your Google Place ID is the unique code that tells the widget exactly which business to pull reviews from. Without it, the widget doesn't know where to look. Thankfully, Google has made this process dead simple.
The best way to find it is with Google's own Place ID Finder tool. It’s basically a map that does the work for you.
- Head over to the tool and start typing your business name and address in the search box.
- Your business should pop up in the dropdown list. Click on it.
- A pin will drop on your location on the map, and a little box will appear with your Place ID inside.
It will be a long string of random letters and numbers. Just copy that entire string and paste it into the setup field in your widget’s dashboard. That’s it—the connection is made.
Why Are My Reviews Not Updating in the Widget?
It’s definitely frustrating when you get a fantastic new review but it’s not showing up on your site. When this happens, it's almost always one of three things.
First, check the widget’s sync settings. Most tools don't check for new reviews in real-time because it would be too demanding. Instead, they refresh on a schedule, often once every 24 hours. Look for a "manual sync" or "refresh" button in your widget's control panel to force an immediate update.
Second, a simple typo in your API key or Place ID can sever the connection. It's worth giving it a quick once-over to make sure everything was copied and pasted correctly.
Finally, the most common culprit is caching. Your website platform (like WordPress), your server, or a service like Cloudflare might be showing you a saved, older version of the page. Find the "purge cache" or "clear cache" button in your site's admin panel and click it. This usually solves the problem instantly. You can also explore the advantages of email marketing to build a system for consistently getting fresh reviews from happy customers.
Ready to add powerful social proof to your website? The Digital Marketing Toolbox makes it easy to find and compare the best Google review widgets on the market. https://grow-your-biz.com


