

At its core, pixel tracking is a clever way for marketers to see how people interact with their websites, ads, or emails. It all hinges on a tiny, invisible image—literally a 1×1 pixel—that gets embedded into the content.
When someone visits a webpage or opens an email containing this pixel, their browser or email client has to load it. That simple act of loading the image sends a message back to a server, logging the interaction. It's like a digital tripwire, confirming that a specific action, like a page view or an email open, has happened. This gives businesses a clear picture of their campaign's performance without needing to handle personally identifiable information directly.
Demystifying the Tracking Pixel
Think of it like this: you've sent out invitations to a big event and you want to know who's actually opened them. You could put a tiny, invisible mark inside each envelope. When someone opens it, the mark sends you a discreet signal. That's exactly what a tracking pixel does online.
It's a snippet of code that places a minuscule, transparent image onto a website, email, or digital ad. Because it's so small and see-through, it's completely invisible to the user. But when their browser loads the page, it also loads this hidden pixel, which "fires" off a signal to its home server.
This seemingly simple process unlocks a huge amount of anonymous data, completely changing how we measure what works and what doesn't. For a really thorough breakdown, check out this guide on everything you need to know about what a tracking pixel is.
To give you a quick summary, here's a look at the essentials of pixel tracking.
Pixel Tracking at a Glance
| Concept | Description | Primary Use |
|---|---|---|
| Tracking Pixel | A tiny, transparent 1×1 pixel image embedded in a website or email. | To log user interactions like page views, ad clicks, or email opens. |
| How It Works | When the pixel loads, it sends a request to a server, confirming an action. | Measuring campaign reach and engagement in real-time. |
| Why It's Important | Provides data for campaign optimisation, audience retargeting, and ROI analysis. | To connect marketing spend directly to user actions and conversions. |
This simple tool is the engine behind so much of modern digital marketing, from social media ads to email newsletters.
The Three Core Jobs of a Tracking Pixel
At its heart, a tracking pixel really does three main things for a business trying to get to grips with its audience and sharpen its marketing. Each one builds on the last, creating a powerful feedback loop of data, analysis, and action.
- Measuring Campaign Effectiveness: Pixels give you a direct line of sight into how many people saw your ad or opened your promotional email. This immediate feedback helps you figure out which campaigns are grabbing attention and which ones are just getting ignored.
- Understanding User Behaviour: By placing pixels on key pages—like product pages, sign-up forms, or the checkout—you can literally map out the customer journey. You get to see the paths people take, where they get stuck, and what content they're most interested in.
- Enabling Retargeting Strategies: This is a big one. Once a pixel has identified someone who visited your site, it can help you show them relevant ads on other platforms, like Facebook or Google. This keeps your brand front and centre, gently nudging them to come back and finish what they started.
A Cornerstone of Digital Measurement
This technology isn't some new-fangled trend. It’s been a bedrock of UK digital marketing for the better part of two decades. When tracking pixels became widely available in the early 2000s, they transformed how businesses measured success. For the first time, marketers could actually quantify email open rates—a metric that was previously pure guesswork.
According to the UK's DMA Email Council, these pixels are still absolutely essential today for proving email delivery and monitoring performance.
By acting as a silent data collector, the tracking pixel bridges the gap between a marketing action and a customer reaction. It provides the concrete evidence needed to move from guessing what works to knowing what works, allowing for smarter budget allocation and more impactful campaigns.
How Pixel Tracking Works Behind the Scenes
So, how does this all work? If you peek under the bonnet, the whole system is built on a surprisingly simple idea: a tiny, invisible image.
This isn't just any image. It's usually a 1×1 transparent GIF file, so minuscule that it has zero effect on how a website or email looks. It's completely hidden from the user.
This tiny pixel is embedded in the page's code. When you open an email or land on a webpage, your browser loads everything it sees, including this invisible image. To do that, it has to send a request to the server where the pixel is stored. That request is the magic ingredient—it's the signal that tells the server, "Someone just viewed this page!"
This simple action lets platforms log crucial, anonymous information. The data sent back includes things like the type of browser and operating system being used, and the IP address, which gives a clue about the user's general location. It’s a subtle but powerful way to gather insights without getting in the way.
The whole thing is a straightforward, three-step journey: a user visits, the pixel loads, and a signal is sent back to the server.
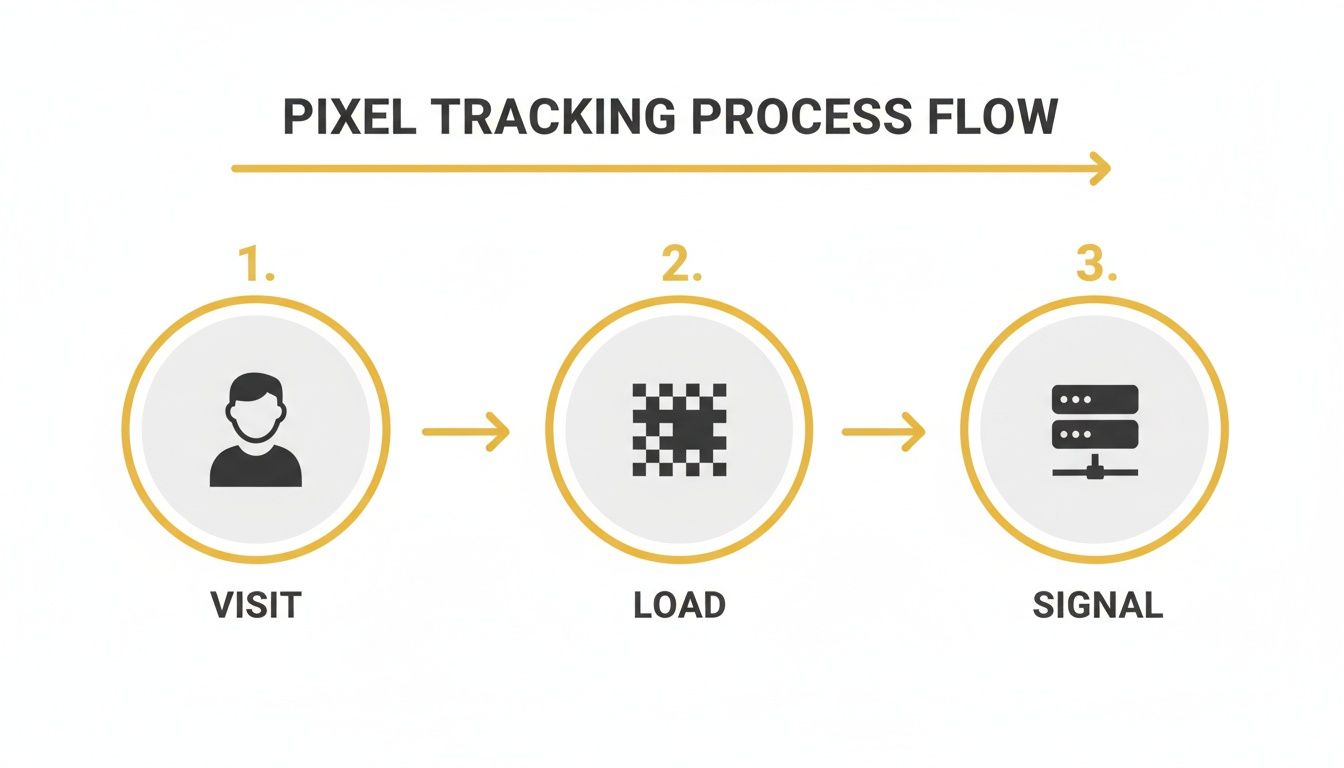
As you can see, it’s a clean process. The user arrives, the browser loads the invisible pixel, and the interaction gets logged.
The Role of the Server Request
Everything hinges on that server request. When your browser asks the server for that tiny pixel, it’s doing more than just fetching an image—it's triggering a data transaction. The server on the other end logs all the details that come with that request, piecing together a picture of what users are doing.
Think of it like a librarian scanning a library book. The system doesn't just know the book is gone. It also records who checked it out (the user's browser), when they did it (the timestamp), and from which branch (the IP address). That's a great analogy for how pixel tracking works for digital actions.
Conversion vs. Retargeting Pixels
While the core technology is the same, not all pixels are created equal. They're often categorised based on their specific job. The two you'll run into most often are conversion pixels and retargeting pixels.
- Conversion Pixels: You'll find these on pages that mark a successful goal, like a "Thank You" page after a purchase or a "Subscription Confirmed" message. They only fire when a user completes a specific action, letting you trace that conversion directly back to an ad campaign or marketing channel.
- Retargeting Pixels: These are spread more widely across a site—on product pages, blog posts, you name it. Their main job is to build a list of people who have shown some interest in what you offer. This lets you "retarget" them later with relevant ads on platforms like Meta or Google after they've left your site.
A conversion pixel tells you, "Did my campaign actually lead to a sale?" A retargeting pixel tells you, "Who showed interest that I can talk to again?" Both are vital for a strong marketing feedback loop.
How Pixels Differ from Cookies
It's easy to get pixels and cookies mixed up, since they're both used to track user data. But they work in fundamentally different ways.
A cookie is a tiny text file that a website saves onto your browser. It’s great for tracking your activity across multiple visits to the same site, but it's stuck in that specific browser on that one device.
A tracking pixel, on the other hand, isn't stored on your device at all. It's an image that gets loaded from a server every time. This server-to-server chat means pixels can often connect the dots across different devices, especially if you're logged into a platform like Google or Facebook. This gives marketers a much more unified view of a customer's journey.
What Can You Actually Do With a Tracking Pixel?
Knowing the theory is great, but the real magic happens when you see what pixel tracking can do for a business. This isn't just a tool for data nerds; it's a practical powerhouse for anyone involved in growth, whether you're running an online shop or writing blog posts. It’s the difference between guessing what people are doing on your site and knowing.
Let's break down how different teams use pixel tracking to get real, measurable results.
Map the E-commerce Customer Journey
For anyone managing an e-commerce store, the customer's journey from their first click to the final 'thank you' page is everything. Pixel tracking gives you a detailed map of that entire path, showing you all the shortcuts, detours, and dead ends your customers are taking.
By placing pixels on crucial pages—like your product pages, the shopping cart, and the checkout—you can see exactly where people get stuck. Are they bailing when they see the shipping costs? Is the payment page confusing them? This data is gold. When you consider that nearly 70% of online shopping carts are abandoned, pixels help you figure out why. This insight lets you test solutions, like offering a free shipping threshold or streamlining your checkout form.
With pixel tracking, you're no longer guessing where your sales funnel is leaking. You have a clear, data-backed guide showing you exactly which holes to plug to increase conversions and recover lost sales.
Even better, pixels let you group visitors based on what they did. You can create a segment of people who looked at a certain type of product or added an item to their cart but never finished the purchase. This is the perfect audience for a targeted follow-up campaign. To learn more about this powerful tactic, check out our guide on what is retargeting advertising, which dives deep into turning these insights into profit.
Prove Your Worth as a Marketing Agency
If you work at a marketing agency, proving your value to clients is the name of the game. They want to see a clear return on their investment (ROI), and pixel tracking is your best friend for showing them exactly that. It draws a straight line from the campaigns you run to the results they deliver.
When you launch an ad campaign on Meta or Google, pixels enable incredibly precise conversion tracking. You can go back to your client and say with total confidence, "We spent £1,000 on this campaign, and it directly brought in 50 sales, worth £5,000 in revenue." That kind of direct attribution is simply impossible without pixel data.
This detailed tracking also lets you optimise campaigns on the fly. By seeing which ads, audiences, or channels are driving the most conversions, you can shift your client's budget to where it's working hardest. This proactive, data-led approach doesn't just boost performance; it builds massive trust with your clients by showing them you're managing their money for maximum impact.
Sharpen Your Content and Build an Audience
For content creators and bloggers, success comes from knowing what your audience loves. Pixel tracking is like a direct feedback loop for your content strategy, showing you which topics and formats truly grab and hold people's attention.
By placing pixels on your blog posts, you can see which articles pull in the most traffic from your social media promotions. This tells you what your audience is genuinely interested in, helping you plan your content calendar with confidence.
More importantly, this data lets you build incredibly specific custom audiences on platforms like Meta and LinkedIn. Imagine creating an audience of everyone who has read articles on your blog about a particular topic. The next time you promote a related product or a new piece of premium content, you're advertising to a warm audience that’s already shown a keen interest. This makes your promotions far more effective and helps you build a loyal community around your work.
What You Actually Gain from Using Tracking Pixels
Let's move past the technical stuff and talk about what really matters: the tangible, bottom-line benefits of putting tracking pixels to work. Think of it as switching from navigating with a blurry map to using a high-precision GPS. You stop guessing and start making smart, data-backed decisions that make every pound you spend work that much harder.
The most immediate win is a crystal-clear view of your campaign performance. Pixels give you the ground-truth data to see precisely which ads are bringing in sales and which are just eating up your budget. This clarity means you can adjust your spending on the fly, pulling money from what isn't working and pouring it into the channels that are delivering real results.
This naturally leads to a much healthier return on investment (ROI) and a lower cost to acquire each new customer (CAC).
Get to Know Your Audience on a Deeper Level
Ever wish you could be a fly on the wall as people browse your website? That's essentially what pixel tracking gives you. By watching user behaviour—which pages they linger on, what products they click, how they move through your site—you start to build a surprisingly rich picture of their interests and what they’re looking for.
This isn't just trivia; it's the raw material for creating powerful audience segments. Instead of blasting the same message to everyone, you can create specific, targeted groups. For instance, you could group together everyone who looked at a certain product category or all the users who got as far as the checkout page before leaving.
Having this level of detail allows you to tailor your messaging with incredible precision, so you're speaking directly to the unique needs of each group.
When you understand the specific actions people are taking, you shift from shouting at a crowd to having a one-on-one conversation. That’s the secret to marketing that truly connects and converts.
Power Up Your Personalised Retargeting Campaigns
Once you’ve built those detailed audience segments, you have the perfect fuel for incredibly effective retargeting campaigns. Pixels let you follow up with people who showed interest but didn't buy, reaching them with personalised ads on platforms like Meta or Google.
This is so much more than just a generic brand reminder. It’s about showing them the exact product they were just looking at, or maybe offering a small discount to nudge them over the finish line. This kind of personalised, timely follow-up is proven to boost conversion rates because it’s genuinely relevant to the user. To get the most out of it, it helps to understand different attribution models, which help you see which touchpoints truly deserve the credit.
Drive Real Growth and Bring Down Costs
When you combine all these benefits, you get a powerful engine for business growth. In the fiercely competitive UK market, pixel tracking is a go-to method for keeping customer acquisition costs in check. A recent report from LOCALiQ, drawing on data from over 500 UK businesses, found that 48.2% plan to keep their display ad spending steady—a channel that leans heavily on pixels—while 20.3% are actually planning to increase it. This isn't blind faith; it's confidence born from the precise metrics that pixels deliver. You can dig into more trends in the UK Digital Marketing Statistics 2024 report.
The insights you gain from tracking pixels ripple out far beyond your ad campaigns. They can give you a clear roadmap for improving many parts of your business:
- Website Design: Seeing where users consistently drop off can flag up confusing navigation or other usability problems that need fixing.
- Content Strategy: Knowing which articles or guides get the most engagement tells you exactly what kind of content your audience wants more of.
- Product Development: If a product gets tons of views but very few sales, that might point to an issue with its price, description, or images.
By directly connecting user behaviour to business outcomes, pixel tracking equips you with the intelligence to make smarter decisions across your entire strategy, paving the way for sustainable growth and a serious competitive advantage.
A Step-By-Step Guide to Implementing Pixel Tracking
So, you understand what a tracking pixel can do, but making the jump to actually using one can feel a bit technical. The good news is that it’s far more straightforward than you might think. Most modern marketing platforms have done the heavy lifting, so you often don't need to write a single line of code yourself.
Let's walk through the essential steps, from generating your first pixel to making sure it’s firing correctly on your website.

Step 1: Generate Your Unique Pixel Code
First things first, you need to get the actual code. This process starts inside the advertising or analytics platform you plan to use, where you'll generate a unique JavaScript snippet tied directly to your account. This code is the engine of your entire tracking setup.
You’ll typically find this in the back-end of platforms like:
- Meta (Facebook & Instagram): Head over to the Meta Events Manager. You'll see an option to "Connect Data Sources" where you can create a new pixel and copy the code it gives you.
- Google Ads: Inside your Google Ads account, navigate to "Tools and Settings". From there, set up a "Conversion" action, which will give you a Google tag (gtag.js) to install.
- LinkedIn: In the LinkedIn Campaign Manager, look for "Account Assets". You’ll find the "Insight Tag" section where you can generate your unique code snippet.
Each platform will guide you through the process and hand you the code you need for the next step.
Step 2: Add the Pixel to Your Website
With your code snippet in hand, the next job is to add it to your website's HTML. It needs to be placed within the <head> section of your site’s code. Why there? Placing it in the header ensures it loads on every single page, giving you a consistent view of how visitors move around your site.
You have a few ways to get this done, depending on your technical confidence and what your website is built on.
The main goal here is to get the base code installed across your entire site. This captures all the basic page views, which creates the foundation for tracking more specific actions later, like someone clicking a button or filling out a form.
If you’re using a popular Content Management System (CMS), this is usually a pain-free process:
- WordPress: Many themes have a built-in spot in their settings for adding header scripts. If not, a simple plugin like "Insert Headers and Footers" will do the trick, letting you paste the code without ever having to touch your site's core files.
- Shopify: From your Shopify admin panel, go to "Online Store" > "Preferences". You'll find specific sections for different pixels (like the "Meta Pixel"). Often, you just need to paste your pixel ID, and Shopify takes care of the rest.
Step 3: Simplify with Google Tag Manager
If you plan on using multiple tracking pixels—say, from Google, Meta, and LinkedIn—adding them all directly to your site can get messy and slow things down. This is where a tag management system like Google Tag Manager (GTM) is a real game-changer.
Instead of plastering multiple code snippets across your site, you just add the one GTM container snippet. After that, you can add, update, and manage all your different tracking pixels from inside the GTM dashboard. It keeps your website code clean and makes your life a whole lot easier. To get going, check out our in-depth guide on how to set up Google Tag Manager.
Step 4: Verify Your Installation
Once the code is on your site, there's one final, crucial step: checking that it actually works. You don’t want to launch a campaign and spend money, only to find out weeks later that your pixel wasn't firing correctly.
Luckily, there are some brilliant (and free) browser extensions that make this easy.
- Install a Pixel Helper Extension: Pop over to your browser's extension store and search for the helper that matches your platform. The most common ones are the Meta Pixel Helper for Chrome and the Google Tag Assistant.
- Visit Your Website: Open a new tab and go to your own website. Click the little extension icon in your browser's toolbar.
- Check the Status: The extension will immediately tell you if it found a pixel on the page and if it loaded successfully. A green icon or checkmark is the universal sign that everything is good to go.
Once you see that confirmation, you're officially up and running. You're now ready to start collecting valuable data to measure your campaign performance and make smarter marketing decisions.
To make this process even clearer, here’s a quick checklist you can follow to ensure you’ve covered all the bases.
Pixel Tracking Implementation Checklist
| Step | Action | Key Consideration |
|---|---|---|
| 1. Choose Platform | Select the ad/analytics platform (e.g., Meta, Google). | Your choice depends on where you run your ads or what data you need. |
| 2. Generate Code | Navigate to the platform’s event manager and create a new pixel. | Copy the entire JavaScript code snippet provided. |
| 3. Access Website | Log in to your website’s back-end (e.g., WordPress, Shopify). | Ensure you have administrator-level permissions to edit code or settings. |
| 4. Install Code | Paste the pixel code into the <head> section of your website’s HTML. |
Use a tag manager like GTM for multiple pixels to keep your site clean. |
| 5. Verify Installation | Install a browser extension like Meta Pixel Helper or Google Tag Assistant. | Visit your site and check the extension to confirm the pixel is active and green. |
| 6. Configure Events | Set up specific event tracking (e.g., 'AddToCart', 'Purchase'). | This goes beyond page views and tracks valuable user actions. |
| 7. Review Privacy | Update your privacy policy and cookie consent banner. | Be transparent with users about what you’re tracking and why. |
Following these steps will ensure your tracking pixel is set up correctly, legally, and effectively from day one.
Navigating Privacy Compliance and Best Practices
Using tracking pixels effectively means using them responsibly. In an age where data privacy is a top priority for consumers and regulators alike, understanding the rules of the road isn't just good practice—it's essential for building trust and avoiding hefty penalties.
The digital privacy world is largely governed by powerful regulations, most notably the General Data Protection Regulation (GDPR) in Europe. This framework gives people genuine control over their personal data. For marketers, this means you must get clear and explicit consent before you can legally track a user’s activity.

This is precisely why you see cookie consent banners popping up on nearly every website you visit. They aren't just a friendly suggestion; they're a legal requirement to tell people what data you’re collecting and get their permission first.
Building Trust Through Transparency
A well-designed cookie banner and a clear, easy-to-read privacy policy are your first line of defence. More than that, they're your best trust-building tools. Hiding your tracking activities behind a wall of confusing legal jargon is a surefire way to damage your brand's reputation.
Your privacy policy should plainly state:
- What you track: Be specific about the kinds of data your pixels collect.
- Why you track it: Explain that you use this data for legitimate marketing purposes, like making the user experience better or measuring how well your ads are doing.
- How users can opt-out: Provide straightforward instructions for anyone who changes their mind and wants to withdraw consent.
Being upfront about your tracking practices is non-negotiable. Transparency shows respect for your audience's privacy, which is the bedrock of any lasting customer relationship.
For a deeper dive into controlling what data gets collected and how to protect yourself from excessive tracking, you can explore practical steps for ensuring privacy in pixels and minimizing digital exposure.
The Evolving Technical Landscape
Compliance isn't just about getting your legal policies right; it's also about adapting to technological shifts designed to protect user privacy. Major browser developers and tech giants are constantly updating their platforms, and these changes directly impact how tracking pixels function.
Take Apple’s Intelligent Tracking Prevention (ITP) in Safari and its App Tracking Transparency (ATT) on iOS. These features have significantly limited the ability of pixels to follow users across different websites and apps. Add the rise of ad-blockers to the mix, and you'll find a growing portion of your audience is simply invisible to traditional client-side pixels. This tech can lead to incomplete data, making it much harder to measure your campaign’s effectiveness accurately.
Moving Towards a More Resilient Future
To counter these challenges, many businesses are now turning to server-side tracking. It's a clever shift. Instead of sending data directly from a user's browser to a third-party platform like Meta, the information is first sent to your own server. From there, you have complete control over what gets forwarded.
This method brings some major advantages to the table:
- Improved Accuracy: It's far more resilient to ad-blockers and browser restrictions, which means you get more reliable data.
- Enhanced Security: You have greater control over what data leaves your ecosystem, bolstering privacy.
- Better Site Performance: Shifting tracking scripts off the client-side can often help your website load faster.
By pairing transparent policies with modern solutions like server-side tagging, you can continue to gain valuable insights while fully respecting your users' right to privacy. It’s a balanced approach, and frankly, it's the only sustainable way forward.
Pixel Tracking FAQs
Even once you've got your head around the basics of pixel tracking, a few common questions always seem to pop up. Let's run through some of the most frequent queries marketers have, so you can feel confident about how this all works in the real world.
What’s the Difference Between a Tracking Pixel and a Cookie?
It’s easy to get these two mixed up, but they play different roles. A cookie is a tiny text file that a website saves in your browser. Its job is to remember you and your activity on that specific site. Think of it like a loyalty card for a single shop – it only works there.
A tracking pixel, on the other hand, is a tiny image loaded from a server. That server-to-server chat allows it to follow a user's journey more broadly, even across different devices if they're logged into a large ecosystem like Google or Meta. A pixel reports an action almost instantly, while a cookie just stores information to be read later.
In short: a cookie lives on your device, while a pixel is a request sent to a server. That’s the key distinction, and it’s why pixels are so much more flexible for cross-platform measurement.
Will Tracking Pixels Slow Down My Website?
The short answer is yes, they can, but the impact is usually so small you'd never notice. A single, properly implemented tracking pixel is just a minuscule 1×1 image. On its own, it’s not going to cause any trouble.
The problems start when you begin plastering your site's code with multiple pixels from different platforms. Each one fires off another server request. To get around this, the best practice is to use a tag management system like Google Tag Manager. It neatly organises all your tags and streamlines the requests, keeping any effect on your page speed to an absolute minimum.
How Does Apple's App Tracking Transparency Affect Pixels?
Apple’s App Tracking Transparency (ATT) framework was a huge shake-up for pixel tracking, especially on mobile. ATT forces apps to ask for your explicit permission before they can track what you do across other companies' apps and websites.
If a user says no, it suddenly becomes incredibly difficult for platforms like Meta to connect the dots between an ad click and a later app install or purchase. This has made campaign measurement a lot trickier and has pushed marketers to explore server-side tracking and new modelling techniques to try and fill in the missing data.
Are Tracking Pixels Still Effective with Ad Blockers?
Ad blockers are definitely a thorn in the side of pixel tracking. Most of them are smart enough to spot and block the scripts that fire tracking pixels, particularly those from major ad networks. When someone with an active ad blocker lands on your site, there's a good chance your pixel won't load, and their visit will go completely unrecorded.
This means the data you collect will inevitably be incomplete because a slice of your audience is essentially invisible. While there's no silver bullet, switching to server-side tracking is a much more robust approach, as it’s not as easily derailed by the ad blockers running in a user’s browser.
Ready to discover the perfect tools to power your marketing strategy? At The Digital Marketing Toolbox, we've curated the best solutions in SEO, analytics, and automation to help you grow your business. Find, compare, and implement top-tier tools with ease by visiting The Digital Marketing Toolbox website today.


