
At their core, countdown timers are dynamic, real-time clocks you pop right into an email. They tick down to a specific moment—the end of a sale, the start of a webinar, you name it. It's all about using clever psychology, specifically urgency and scarcity, to get people to act now instead of later. This simple trick can be a game-changer for boosting your click-through rates and, ultimately, your conversions.
Why Countdown Timers are a Secret Weapon for Email Marketers
Let's be honest, the inbox is a battlefield. You're fighting for every second of your subscriber's attention. While static text and pretty images are nice, they're easy to scroll past. A ticking clock? That's much harder to ignore. It turns a standard, run-of-the-mill email into something that feels alive and demands attention.
The real magic here is how it taps directly into our collective fear of missing out (FOMO). When someone sees the minutes and seconds literally slipping away, it creates a powerful psychological nudge. Suddenly, that special offer isn't just an abstract idea they can come back to whenever. It’s a real, tangible opportunity with an expiration date, and that makes people want to grab it before it's gone.
Tapping into Urgency and Scarcity
Think about the buzz around a big Boxing Day sale or a limited-edition sneaker drop. A huge part of the excitement comes from the deadline. Countdown timers bottle that same energy and deliver it straight to someone's inbox. They make the scarcity feel real and the urgency impossible to miss.
This approach works especially well in the UK. With over 380 billion emails sent in 2023, standing out is tougher than ever. Marketers need tools that get an immediate response, and timers are brilliant at doing just that. We know UK consumers respond well to clear, time-sensitive deals, and a ticking clock is the clearest signal you can send.
A countdown timer transforms a passive suggestion like "Check out our sale" into an urgent instruction: "Buy now before the sale ends." It fundamentally shifts the subscriber's mindset from just browsing to actively buying.
Turning Passive Readers into Active Buyers
At the end of the day, every email campaign has a goal. The various advantages of email marketing are only realised when you can get your audience to take that next step. A timer acts as a constant visual reminder of what they'll miss if they put it off.
It’s a strategic tool you can use in all sorts of scenarios:
- Flash Sales: Perfect for highlighting a quick 24-hour or 48-hour promotion.
- Event Registrations: Create a buzz by counting down to the early-bird ticket deadline.
- Holiday Promotions: Build massive anticipation for big events like Black Friday or Valentine's Day.
- Abandoned Carts: Nudge shoppers by showing them their reserved items or special discount will expire soon.
By adding a simple ticking clock, your email becomes more than just an announcement. It becomes an interactive, persuasive experience. This isn't just a marketing gimmick; it's a proven method for motivating your audience and giving your campaign performance a serious boost.
Choosing the Right Countdown Timer Tool
Picking the right tool to create your email countdown timers is the first real hurdle you'll face. The options out there can feel overwhelming, ranging from dead-simple free generators to powerful, feature-rich platforms that come with a subscription. Honestly, the best choice for you boils down to your specific campaign goals, how comfortable you are with the tech side of things, and what you're trying to achieve.
A sensible first move is to check what your own Email Service Provider (ESP) offers. Platforms like Mailchimp or Klaviyo sometimes have built-in timer features, which can be the path of least resistance. But, and it's a big but, dedicated third-party tools almost always give you more creative freedom and advanced options.
Key Features to Look For
When you start comparing different services, there are a few non-negotiables to keep an eye on. First up is compatibility. It’s crucial that the tool spits out code that plays nicely with your ESP. Nothing is more frustrating than designing the perfect timer only to find it breaks inside your email template.
Next is customisation. A decent tool lets you tweak everything—colours, fonts, backgrounds—to perfectly align with your brand's look and feel. This is what stops your timer from screaming "tacked-on gimmick" and instead makes it look like a seamless, professional part of your design.
The best countdown timer is one that feels invisible—it should blend so perfectly with your branding that it enhances the message of urgency without distracting from it. The goal is seamless integration, not a jarring interruption.
Finally, you need to think about the type of timer you need. Is this for a one-off flash sale with a hard stop date? Or are you looking for an "evergreen" timer for an automated welcome series that gives every new subscriber their own unique countdown? Many tools don't do both well, so this is a major point of difference. Getting this right is a fundamental part of any good digital marketing plan, something we dive into in our https://grow-your-biz.com/beginners-guide-to-digital-marketing/.
Deciding Between Free and Paid Tools
Free tools are a fantastic way to dip your toes in the water. They usually give you enough basic customisation to get a simple timer up and running for something like a weekend sale. For many businesses just starting out, these are more than enough.
This little infographic is a great gut-check for deciding when a timer makes sense.
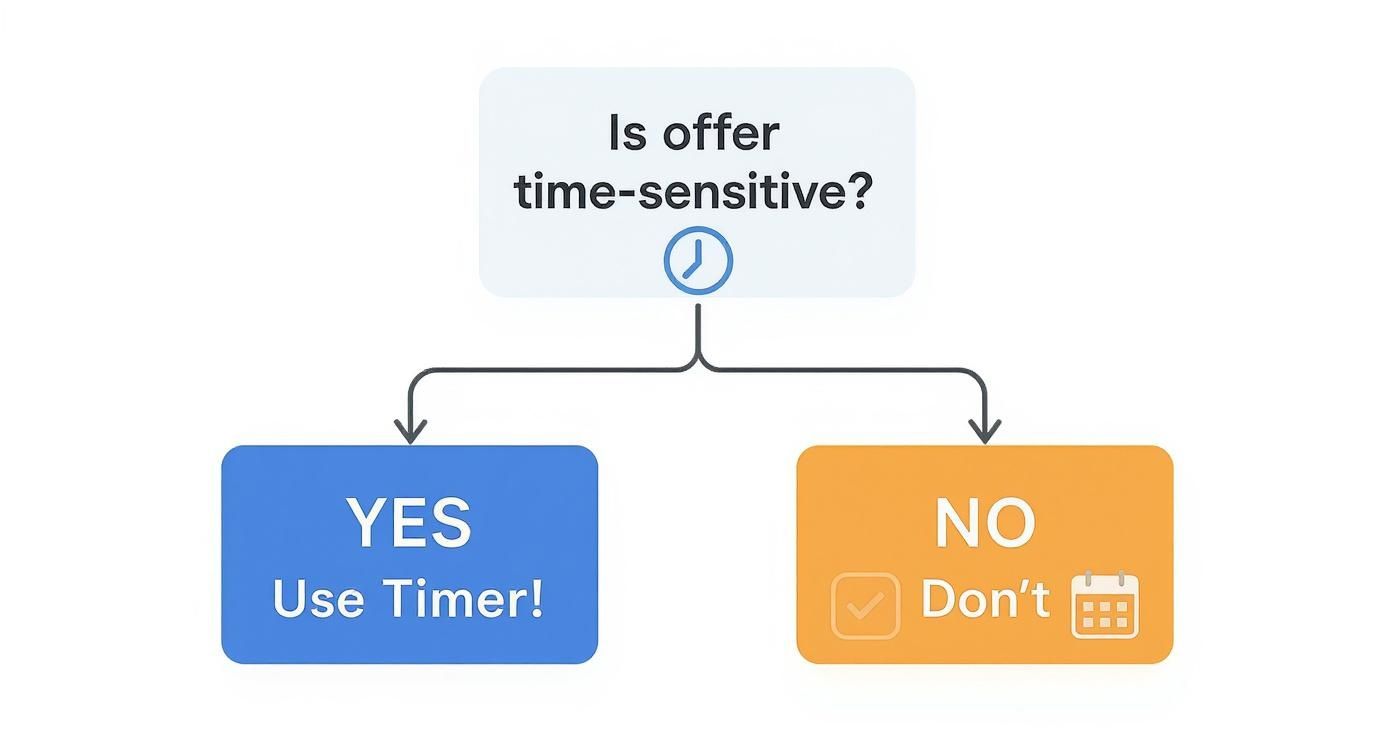
As you can see, timers work best when they're linked to a real, time-sensitive offer. It’s all about genuine urgency.
Paid services, as you'd expect, are where you unlock the really powerful stuff. These often include game-changing features like:
- Advanced Analytics: Go beyond just sending and see how many people saw and clicked your timer, giving you real data on its impact.
- Time Zone Support: This is a big one. The timer can automatically adjust its end time based on where your subscriber lives.
- Dynamic Expiry Content: What happens when the clock hits zero? Instead of just showing a dead timer, you can have it automatically swap to a different message or image.
To help you weigh your options, I've put together a quick comparison of what you can generally expect from different tiers of countdown timer tools.
Comparison of Countdown Timer Tool Features
| Feature | Free Tools | Mid-Tier Tools | Premium Tools |
|---|---|---|---|
| Basic Customisation | ✅ | ✅ | ✅ |
| Timer Types | Fixed-date only | Fixed-date & basic evergreen | All types, including recurring |
| Branding Removal | ❌ (Usually has a watermark) | ✅ | ✅ |
| Advanced Analytics | ❌ | ✅ | ✅ |
| Time Zone Support | ❌ | Some have it | ✅ |
| Dynamic Expiry Content | ❌ | Some have it | ✅ |
| API Access | ❌ | ❌ | ✅ |
Ultimately, the right tool is the one that fits your budget, slots into your existing workflow, and actually helps you hit your campaign targets. For e-commerce stores, it's also worth looking for platform-specific solutions. If you're on Shopify, for example, there's a whole world of free countdown timer Shopify apps designed to integrate perfectly and drive sales.
How to Create and Customise Your First Timer
Right, you’ve picked your tool, so now for the fun part: actually building your first timer. Most timer generators I've worked with are pretty intuitive and follow a similar flow. For this walkthrough, let's pretend we're creating a timer for a 48-hour flash sale.
The very first thing you'll do is set the endpoint. This means choosing the exact date and time your countdown will hit zero. Precision is everything here. If you're running a UK-focused campaign, you absolutely must select the right time zone, like (GMT) London, to make sure the deadline is accurate for everyone you're targeting. A small mistake here can throw the whole campaign off.
Nailing the Design and Branding
Once the timing is locked in, you can get creative with the customisation. This is where you make the timer truly yours and ensure it feels like a natural part of your brand, not some clunky, third-party add-on.
Here are the key elements you'll want to tweak:
- Colours: This is a big one. Match the background and digit colours to your brand’s palette. A good rule of thumb is to use your primary brand colour for the numbers and a more neutral, on-brand shade for the background. This helps it stand out without clashing.
- Fonts: Don’t just stick with the default. Choose a font that you already use on your website or in other marketing materials. Consistency is what makes your brand look professional and trustworthy.
- Labels: You can also change the text for "Days," "Hours," "Minutes," and "Seconds." Keep it classic or, if it fits your brand, inject a bit of personality.
Think of it like dressing the timer for the occasion. If you're a high-end fashion brand, you might go for a minimalist design with a clean, sans-serif font and a monochrome colour scheme. On the other hand, a playful children's brand could get away with a rounded font and bright, vibrant colours to match its fun vibe.
From my experience, the most effective countdown timers are the ones that blend seamlessly with the rest of the email. You want your subscriber to notice the urgent message, not get distracted by a timer that looks out of place.
Finalising and Generating the Code
With the design looking spot-on, the final step is usually as simple as hitting a "Generate" button. The tool will spit out a snippet of HTML code. This code is the magic ingredient that brings your animated, ticking timer to life right inside an email.
All you have to do is copy this code. The next job is to get it into your email template, which we’ll walk through in the next section. It's a pretty straightforward copy-and-paste job, but getting it right is crucial. A broken timer can honestly do more harm to your credibility than having no timer at all.
Getting Your Timer Live and Looking Good in Every Inbox
Alright, you’ve designed the perfect countdown timer. Now for the crucial part: making sure it actually works for everyone on your list. Just dropping the HTML code into your email template is the easy bit; the real work lies in making sure it doesn't look broken when it lands in someone's inbox. Honestly, a dodgy-looking timer can do more harm than good, shattering the trust you've built.
Your timer tool will give you a snippet of HTML code made specifically for email. If you're using a platform like Mailchimp or Klaviyo, you'll look for an HTML or code block in the editor. You just drag that block into your email design and paste the code in. Simple enough, but this is where the fun with different email clients begins.
Navigating the Email Client Maze
Anyone who's worked in email marketing knows the pain of client compatibility. What looks stunning in Gmail can completely fall apart in an old version of Outlook. This is especially true for countdown timers for email, which usually rely on animated GIFs to get that ticking-down motion.
The main offender, as usual, is Microsoft Outlook (specifically the 2007-2016 versions). It famously refuses to play animated GIFs. Instead of your beautiful, ticking timer, it just shows the very first frame of the animation and freezes it there. Imagine a subscriber opening your "1-hour flash sale" email with 10 minutes to go, only to see a timer stuck on "59:59". Not exactly the urgency you were going for.
Any decent timer tool is built for this reality. It should automatically generate a static "fallback" image within the code. This means that while most subscribers see the animation, those on old versions of Outlook see a clear, non-moving image of the timer instead. It’s a simple fix that ensures a professional experience for everyone.
You Absolutely Have to Test Your Timer
Don't just cross your fingers and hit send. Rigorous testing is non-negotiable. Sending a test email to your own Gmail and Apple Mail accounts is a decent start, but it won't give you the full picture of what your entire audience will see.
This is where you need a proper testing platform. I've personally relied on services like Litmus and Email on Acid for years. They let you preview how your email will render across dozens of different email clients and devices with a single click. It’s an absolute lifesaver.
Here’s a glimpse of what a Litmus test preview looks like—it shows you everything at once.
This kind of side-by-side view lets you spot problems instantly. You'll see exactly how Outlook handles your fallback image or catch a weird spacing issue that only shows up on a specific Android phone. Finding and fixing these glitches before you launch protects your brand and makes sure the urgency you've carefully crafted actually hits home. Without this final check, you’re flying blind.
Strategic Ways to Use Timers in Your Campaigns
So, you’ve mastered the tech and can now pop a countdown timer into an email. That's the easy part. The real magic happens when you get strategic about why and where you use them. A cleverly placed timer does more than just tick; it turns a standard email into a powerful nudge that gets people to act.
Let's dive into a few real-world scenarios where these timers really pull their weight.
Flash sales are the classic example, and for good reason. When you've got a 24-hour or 48-hour deal, a ticking clock makes the deadline feel real and immediate. It’s that visual proof that the opportunity is genuinely slipping away, pushing anyone who was "thinking about it" to make a decision.
Timers are also brilliant for promoting events. Got a webinar coming up, or perhaps an in-person conference? You can use a timer to count down to the end of your early-bird ticket pricing. This reframes the discount as a reward for being decisive, not just a simple price cut.
Beyond Standard Promotions
Holiday campaigns are another prime spot for countdown timers for email. Just think of the frantic energy around Black Friday or the last-minute scramble for Valentine's Day gifts. A timer counting down to the final delivery day cuts through the noise and helps your customers plan. It’s a helpful visual cue that prevents them from missing out.
Abandoned cart recovery is where timers can be a real game-changer. Imagine someone leaves your site with items in their basket. An hour later, an email lands in their inbox. It not only reminds them what they left behind but also shows a timer ticking down on a 15% discount that expires in just a few hours. This adds a genuine layer of scarcity that most reminder emails completely miss, helping you claw back otherwise lost sales.
The best timers support a genuine deadline. Your audience should see it as a helpful reminder that something valuable is ending soon, not a cheap marketing trick. Get that right, and you’ll build trust while driving action.
The Power of Personalised Evergreen Timers
Ready for a more advanced move? Let's talk about evergreen timers. Unlike a fixed-date timer that ends for everyone at the same moment, an evergreen timer is unique to each subscriber. The clock starts ticking the second they perform an action, like signing up for your newsletter.
This opens up a world of possibilities for creating urgent, personalised offers within your automated email funnels. For instance, you could set up your welcome sequence so every new subscriber gets an email with a special introductory offer that expires 72 hours after they join your list. Suddenly, your automated marketing feels personal and timely. This is a key part of building a great guide to small business marketing.
In the UK, this kind of personalisation isn't just a nice-to-have; it's essential. The latest data from the 2025 email marketing report is eye-opening:
- Over 78% of UK consumers are more likely to make a purchase when offers are relevant to them.
- A staggering 84% will hit 'unsubscribe' if they feel the communication is too generic.
Evergreen timers tap directly into this. By tying the urgency to an individual’s specific journey with your brand, you create campaigns that feel less like mass marketing and more like a one-to-one conversation. The result? Much better engagement and far stronger results.
How to Know if Your Timers Are Actually Working
So, you've launched an email with a slick, ticking countdown timer. It looks great, but is it actually doing anything? Without checking the data, that timer is little more than a decorative GIF. The real skill is connecting that ticking clock to the actions your subscribers take, so you can fine-tune your strategy based on hard evidence, not just guesswork.
Your first port of call should be the metrics that directly show the timer's influence. Don't get bogged down with just open rates. Instead, dig into the click-through rate (CTR) on the timer itself or the main call-to-action button right next to it. Did that specific part of the email get more clicks than in your campaigns without a timer? That's your first major clue.
From there, you need to follow the customer's journey. A spike in clicks is fantastic, but what really matters is a corresponding lift in landing page conversions. Are the people who clicked through actually finishing their purchase or signing up? That's how you know the urgency you created is translating into genuine results.
Pinpointing Your Key Metrics
While you're zeroing in on the timer's specific impact, it's always smart to keep an eye on your broader key email marketing performance metrics. This gives you the full picture. For timers, I've found these three metrics to be the most revealing:
- Click-Through Rate (CTR): The most straightforward comparison. Pit the CTR of your timer-based emails against similar campaigns that didn't have one. A clear uplift here is a massive win.
- Conversion Rate: This one is crucial. Track how many subscribers who clicked your timer-driven CTA went on to complete the goal on your website. This tells you if the urgency is persuasive.
- Revenue Per Email (RPE): For any e-commerce business, this is the ultimate test. Did the email with the timer bring in more cash than your typical promotional send?
The return on investment (ROI) for email marketing that uses urgency is huge in the UK. Industry benchmarks show an average ROI between 3600% and 3800%. To put it simply, for every £1 you spend, you can expect a return of £36 to £38. Timers are particularly brilliant in abandoned cart emails, which, in the UK, often see click-to-open rates almost double that of other emails.
Refining Your Approach with A/B Testing
Once you've got some baseline data, the real fun begins: A/B testing. This is where you methodically test one small change at a time to see what your audience truly responds to.
A/B testing takes all the guesswork out of the equation. Instead of wondering if a red timer works better than a blue one, you let your audience’s behaviour give you the definitive answer. It’s the most direct path to better performance.
Start by creating two versions of your email. They should be identical in every single way except for the one timer element you want to test. From my experience, these are the tests that yield the most interesting results:
- Design: Pit different colour schemes, sizes, or even font styles against each other. Does a loud, high-contrast timer grab more attention than a subtle one that matches your branding perfectly?
- Placement: Where you put the timer matters. Try it right at the top of the email versus positioning it just above your main call-to-action button.
- Messaging: The words around the timer can make a big difference. Test something like "Offer Ends in…" against a more urgent "Last Chance to Save".
By carefully analysing the results from these simple tests, you'll start to build a data-backed picture of what works for your audience. It ensures every countdown timer you send is more effective than the last.
Ready to put these strategies into action? The Digital Marketing Toolbox offers a curated list of resources and tools to help you create, test, and optimise every part of your campaigns. Find the perfect solution to drive real, measurable results today.
Discover the right tool for your next campaign at https://grow-your-biz.com.


