
So, you want to add a widget to your website? It’s usually as simple as grabbing a bit of code from a widget provider and popping it into your site’s HTML.
On platforms like WordPress, you might use a specific plugin or head to the "Appearance > Widgets" area. For builders like Shopify or Squarespace, you'll likely paste the code into a custom code block. The best part? This copy-and-paste job lets you add some seriously dynamic features without needing to know a thing about coding.
From Static Brochure to Interactive Hub

Does your website feel a bit… flat? It’s a common story. You build a beautiful-looking site, but it just sits there, not really interacting with visitors or encouraging them to take action. This is exactly where widgets come into play. They’re powerful, pre-built tools that can turn a passive browsing session into an active, engaging experience.
If you’re just getting your head around the idea, our guide explains in detail exactly what widgets are and how they function.
Think of them as ready-made enhancements you can plug straight into your site:
- Chat boxes offering instant customer support.
- Social media feeds showing off your latest posts.
- Review carousels building immediate trust and social proof.
- Email signup forms to grow your marketing list.
Why Widgets Are Such a Big Deal
Here in the UK, over 1.08 million websites are powered by WordPress, making it the backbone for a huge number of small businesses. For these sites, adding widgets isn't just a nice-to-have; it's essential. The numbers speak for themselves: a large-scale analysis found that websites using widgets can achieve conversion rates four times higher than those without, jumping from an average of 1-2% to an impressive 4-8%.
The real magic of a widget is its ability to add sophisticated functionality to your site in a matter of minutes, not months. It closes the gap between a simple online brochure and an interactive, conversion-focused machine.
In this guide, I’ll walk you through exactly how to add widgets to your platform of choice, no code required. We’ll look at the best tools from our Digital Marketing Toolbox and get them installed, turning your website into a high-performing asset that actively works to grow your business.
Choosing the Right Widget for Your Business Goals
Before you even think about code snippets and plugins, let's step back. What are you actually trying to achieve? Throwing widgets onto your website without a clear goal is a bit like rearranging deckchairs on the Titanic—it looks busy, but it won’t get you anywhere. The real trick is to pick tools that actively push your business forward.
If you’re running an e-commerce shop, your world probably revolves around building trust and nudging customers towards the checkout. This is where a review widget becomes your best friend, offering up that all-important social proof right on the product page.
But if your goal is lead generation, the focus shifts. An embedded email signup form is non-negotiable. It’s the simplest way to turn a casual browser into a subscriber you can nurture through your marketing funnel.
Matching Widgets with Your KPIs
To get this right, you need to connect the dots between a widget and your Key Performance Indicators (KPIs). What are the numbers that keep you up at night?
- Need to boost conversion rates? Widgets that create a sense of urgency are your go-to. Countdown timers are brilliant for this.
- Struggling with high bounce rates? A live chat or a Helpcenter Widget feature can be a game-changer, giving visitors instant answers and a reason to stick around.
- Trying to build brand trust? Nothing beats customer testimonials and review widgets. Seeing positive feedback from real people builds credibility faster than almost anything else. Our deep dive into the Google review widget has some great pointers on this.
When you think this way, you stop adding clutter and start implementing tools that deliver a measurable return.
Now, let's make this more concrete. The table below maps common business objectives to the type of widget that can help you get there, along with a tool suggestion to get you started.
Matching Widget Types to Your Business Objectives
| Business Goal | Recommended Widget Type | Example Tool (from The Digital Marketing Toolbox) |
|---|---|---|
| Increase E-commerce Sales | Review & Social Proof Widgets | Trustpilot, Yotpo |
| Generate More Leads | Form & Pop-up Widgets | OptinMonster, ConvertBox |
| Improve Customer Support | Live Chat & Help Centre Widgets | Intercom, Tawk.to |
| Boost Visitor Engagement | Social Media Feed Widgets | Curator.io, Taggbox |
| Reduce Cart Abandonment | Exit-Intent & Timer Widgets | OptiMonk, Privy |
Choosing a widget from this perspective ensures it's not just a fancy new feature but a strategic asset working to improve your bottom line.
Real-World Scenarios to Get You Thinking
Let’s put this into practice. Imagine an online clothing store wants to increase its average order value. Instead of a generic pop-up, they could add a "Frequently Bought Together" widget on their product pages. It’s a natural, helpful suggestion that directly encourages upselling and pushes that key metric upward.
Or, take a service-based business like a marketing agency. They need more qualified leads. A slick "Request a Quote" form widget, placed prominently in the footer and on key service pages, makes it dead simple for potential clients to raise their hand.
The best widgets feel less like an interruption and more like a helpful guide, solving a specific problem for your visitor at the exact moment they need it.
For anyone in e-commerce, the results can be massive. For instance, some case studies have shown countdown timers can boost conversion rates by as much as 112%. This makes sense when you learn that 60% of UK online shoppers admit the fear of missing out (FOMO) from these timers has pushed them to complete a purchase. You can dig into more statistics on e-commerce widget performance if you want to see the full potential.
Ultimately, it all boils down to knowing your goals and understanding what your audience needs. Start with the "why" before you get lost in the "how," and you’ll be on the right track from day one.
Getting Widgets Live On Your Website: A Practical Guide
Right, let's get down to the practical side of things. Forget the old days of needing a developer on standby for every little change. Adding a widget to your site today is usually no more complicated than a simple copy-and-paste job. It’s a skill anyone can pick up, whether you're running a small business or managing a full-scale marketing campaign.
The entire process really boils down to three key stages, starting well before you even see a line of code. It’s all about strategy first, execution second.
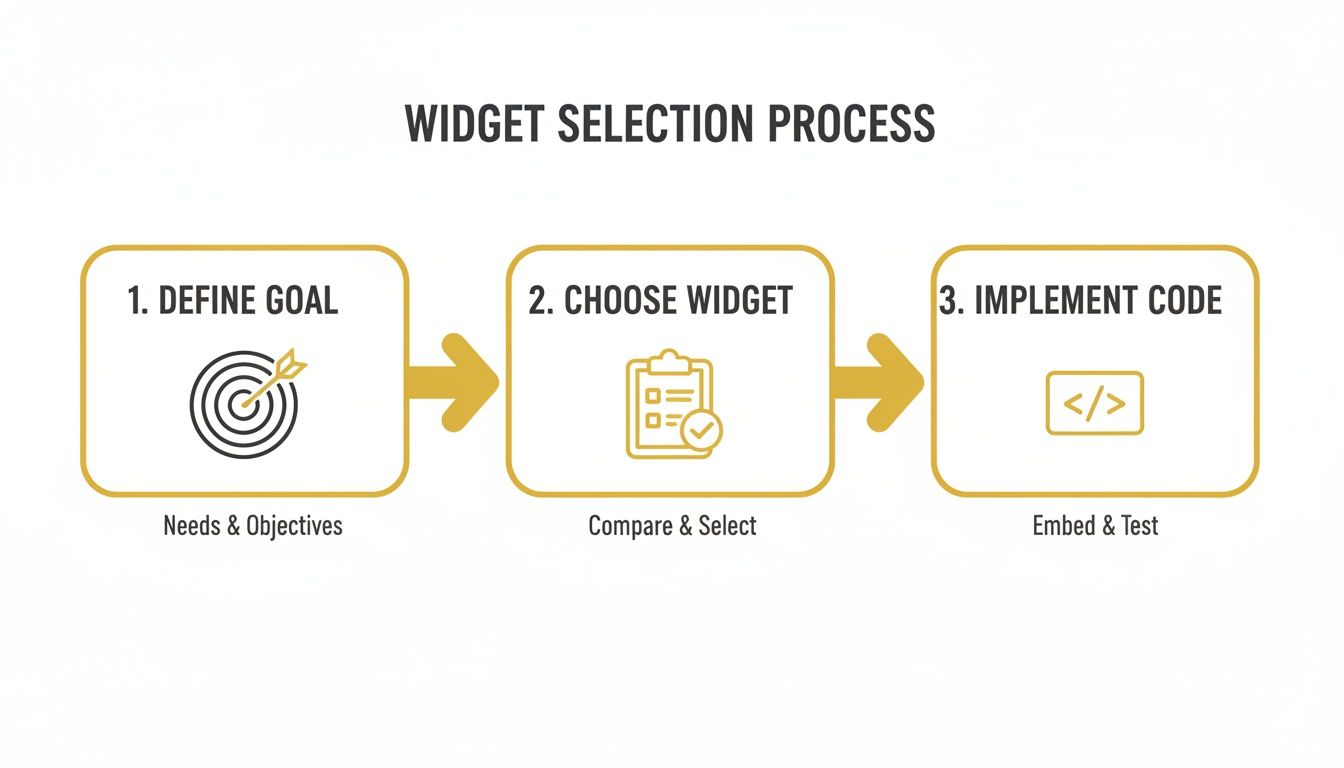
As you can see, a successful rollout starts with a clear business goal. From there, you pick the right tool for the job, and only then do you get to the straightforward installation.
Most of the third-party tools I recommend, like those in our Digital Marketing Toolbox, are designed to make this painless. They generate a ready-made embed code for you. Your only task is to figure out where on your website builder it needs to go.
How to Add Widgets in WordPress
As the most popular content management system out there, WordPress gives you a couple of easy ways to get this done. Your best bet will depend on whether you’re more comfortable using plugins or the classic editor.
For many people, a dedicated plugin is the simplest path. You just head to Plugins > Add New, search for your widget provider (like the Elfsight suite), and then install and activate it. The plugin will usually give you a shortcode, something like [elfsight id='x'], which you can just pop into any post or page.
Alternatively, you can go the traditional route:
- From your WordPress dashboard, navigate to Appearance > Widgets.
- You’ll see a list of available widgets on the left and designated "widget areas" (like your sidebar or footer) on the right.
- Simply drag the widget you want into the area where you want it to appear.
If your site uses the newer Gutenberg block editor, it’s even easier. Just add a “Custom HTML” block to your page and paste the widget’s embed code straight in.
My Pro Tip: Always, always preview the page before you hit publish, especially when using shortcodes. This quick check helps you spot any wonky formatting and ensures the widget looks right before your visitors see it.
Installing Widgets on Shopify and Squarespace
If you're on an e-commerce platform like Shopify or a builder like Squarespace, the process is just as user-friendly. These platforms are built for people who would rather not touch the deep, underlying code, so they have specific places for adding custom scripts.
If You’re on Shopify:
- Head to your Shopify Admin and select Online Store > Themes.
- Find your current theme and click Customise.
- Look for an option to add a new section, and choose “Custom Liquid” or “Custom HTML”.
- Paste the embed code from your widget provider right into that new block.
And for Squarespace Users:
- Start by editing the page or post where you want the widget to live.
- Click an insert point (the little teardrop-shaped icons) and select the "Code Block" from the menu.
- Paste your widget’s embed code into the text field that appears.
With either platform, just remember to save your changes and then check the live site to see your new widget in all its glory.
The great thing is that this core skill—copy, paste, preview—is universal. Once you've done it on one platform, you'll find it's a very similar process on another. This simple workflow empowers you to add powerful features without a steep learning curve. In fact, even more complex additions follow this pattern; a good guide on how to add crypto payments to your website shows how a similar copy-and-paste process can add major new functionality.
Optimising Widgets for Performance and SEO

It’s easy to get excited about adding a shiny new widget, but that excitement can quickly fade if it drags your website’s performance down. A slow, clunky site is a sure-fire way to lose visitors and hurt your search rankings, completely undermining the reason you added the tool in the first place.
Think of performance as part of the widget selection process, not something you check afterwards. The best widgets improve the user experience without sacrificing speed. This means looking for lightweight, well-coded tools from developers who actually care about performance. Trust me, not all widgets are built the same – some are bloated with messy scripts that will cripple your load times.
Keeping Your Website Fast
One of the worst offenders for slowing down a site is what's called synchronous loading. This happens when a widget's script forces the rest of your page to wait until it has completely loaded. Your visitors are left staring at a blank screen, and most won’t stick around.
The fix? Asynchronous loading.
Always look for widgets that use async or defer attributes in their code snippet. These little tags are a game-changer. They tell the browser to load the widget in the background while the rest of your page content appears without delay. It’s a simple technical detail that makes a world of difference to how fast your site feels to a user.
A quick tip from my own playbook: before you commit, run a speed test on your site with a tool like Google PageSpeed Insights. Then, install the widget on a test page and run the scan again. This simple before-and-after check gives you hard data on its real impact.
If a widget hammers your performance score, it’s probably not the right one for you. And if you ever need to get rid of a troublesome one, our guide on how to delete widgets walks you through the process of removing it cleanly.
Boosting Your SEO with Smart Widgets
It's not just about avoiding a negative impact; some widgets can actively help your SEO. Review widgets are a fantastic example of this, but only if they’re built with the right tech.
A great review widget does more than just show off your five-star ratings. It uses schema markup (you might also hear it called structured data). This is a special bit of code that basically spoon-feeds information to search engines in a language they can easily understand.
When your review widget uses schema correctly, Google can pull that data and feature it as "rich snippets" in search results. You've definitely seen these:
- Star ratings that appear right under your business name.
- The total number of reviews displayed next to your listing.
- Even pricing or availability for a specific product.
These snippets make your listing pop. On a crowded search results page, those little gold stars draw the eye and can massively boost your click-through rate. It's a huge competitive edge.
This is how a simple widget becomes a powerful tool for driving more organic traffic. Before you install any widget, always check to see if the provider supports schema markup. It’s a non-negotiable feature if you’re serious about SEO.
Sorting Out Common Widget Installation Problems
So, you’ve followed all the steps, carefully pasted the code snippet, hit publish, and… nothing. Or maybe the widget appears, but it’s a garbled mess that’s thrown your entire page layout into chaos. Take a deep breath. This happens to everyone, and the fix is usually much simpler than you think.
Most of the time, the root cause isn't some deep, technical conflict. It's often something small and easily overlooked. Think of yourself as a detective for a moment; you just need to run through the usual suspects first. From caching glitches to simple copy-paste mistakes, we’ve seen it all.
Let's walk through the most common culprits so you can get things working in a few minutes, without having to send an SOS to your developer.
Your Go-To Diagnostic Checklist
Before you start digging into complex code, run through these quick checks. In my experience, these three steps solve around 80% of all widget installation headaches.
- Purge Your Cache: This is almost always the number one offender. Your website and browser love to hold onto old versions of a page to make things load faster. You need to force them to fetch the new version. Clear your browser cache first, then log into your website's backend and clear its cache too (e.g., through plugins like WP Rocket or W3 Total Cache).
- Double-Check the Embed Code: It sounds basic, but it's incredibly easy to miss a single character like a
<or>when you copy a code snippet. That's all it takes to break it completely. Head back to the widget provider, copy the code again, and maybe paste it into a plain text editor first to make sure it’s perfect before putting it on your site. - Look for JavaScript Errors: You don't need to be a coding whiz for this one. On your webpage, right-click anywhere, choose "Inspect," and then click the "Console" tab in the window that pops up. If you see any angry red text, that's a clear signal that the widget's script is clashing with something else on your site, usually another plugin.
One of the most common scenarios I encounter is a client saying the widget just isn't showing up. Nine times out of ten, they've pasted the code into a visual editor block, which just displays the code as text. You have to make sure you're using an HTML, code, or dedicated embed block for it to actually run.
When the Widget Just Looks… Wrong
What happens if the widget shows up, but it's pushed to the side, way too big, or completely unusable on a mobile phone? This is almost certainly a styling conflict. In simple terms, the widget's design rules (its CSS) are fighting with your website theme's design rules.
A quick way to diagnose this is to start deactivating other plugins one by one, refreshing the page each time. Pay special attention to page builders or optimisation plugins. If the widget suddenly snaps into place after you've turned off a particular plugin, you’ve found your conflict.
If you’ve tried all of this and you’re still pulling your hair out, it’s time to call for backup. Any good widget provider will have a support team ready to help. Just be sure to send them a link to the page where the widget is supposed to be and a quick summary of what you've already tried. It will help them get to the bottom of it much faster.
Got Questions About Website Widgets? We’ve Got Answers.
Even when the installation goes off without a hitch, it's natural for a few practical questions to bubble up. Thinking through the details of cost, security, and how you’ll measure success is key to getting real value from any new tool you add to your site. Let’s tackle some of the most common things people ask.
What’s the Real Cost of Using Website Widgets?
The price tag on widgets can swing wildly, but there's good news for your budget. Most providers I've come across use a freemium model. This means you can get a basic version up and running for free, though it might have some feature limits or carry the provider's branding. It's a fantastic way to test the waters before you pull out your credit card.
If you decide to upgrade, paid plans generally start somewhere in the £10 to £40 per month range. What you get for your money really depends on the tool, but premium tiers usually offer deeper customisation, ditch the branding, and give you access to faster support. My advice? Always start with a free plan or a trial period. Make sure the widget actually helps you hit your goals before you invest.
Are Third-Party Widgets Safe to Add to My Site?
That’s a smart question to ask, and the short answer is: it depends entirely on where you get it from. Trustworthy widget companies pour a lot of resources into security because their reputation depends on it. They keep their code clean, push out regular updates, and patch vulnerabilities to protect both your website and your visitors' data.
To keep your site secure, a few simple rules of thumb I always follow are:
- Stick to the big names: Go with providers that have a proven track record and plenty of positive reviews. A quick search will usually tell you who the reliable players are.
- Dodge unofficial sources: Never, ever download widgets from sketchy marketplaces, forums, or random websites. It's just not worth the risk.
- Keep your tools updated: If the widget is a plugin (like on WordPress), make sure you're always running the latest version to get the newest security fixes.
Choose your tools wisely, and you can add powerful features without giving your website’s security a second thought.
How Do I Know if a Widget Is Actually Working?
Measuring the return on your investment (ROI) is what separates a shiny new toy from a genuine business asset. Before you even install a widget, you need to decide what a "win" looks like. For an email signup form, that’s simple: how many new subscribers did you get? If it’s a review widget, you could look at the conversion rate on pages with the widget versus pages without it.
The most straightforward way to track this is by setting up specific goals in your analytics tool, like Google Analytics. You can create 'events' that fire every time someone clicks a widget's button or submits a form. This gives you concrete data on how people are interacting with it and whether those interactions are turning into leads or sales.
Can I Put the Same Widget on More Than One Page?
Absolutely, and you'll probably want to. Most widgets are built for flexibility. You might, for example, want a live chat icon sitting discreetly in the corner of every single page so customers can always reach you. That consistency is great for user experience.
On the other hand, maybe you have a special call-to-action widget that’s perfect for your most popular blog posts but would feel out of place on your homepage. How you install it usually determines where it shows up. Dropping the code into your site's global footer will make it appear everywhere, while placing it in a specific page's HTML will keep it right there.
Ready to find the perfect, secure, and high-performing widget for your website? Explore hundreds of vetted options in The Digital Marketing Toolbox and discover tools that will drive real growth for your business. Visit us at https://grow-your-biz.com to get started.


