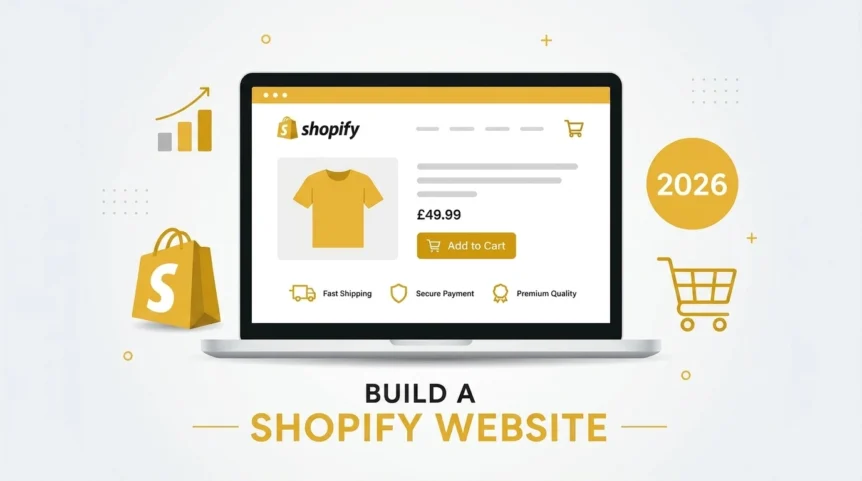
How to Build a Shopify Website From Start to Finish

Jumping straight into the Shopify dashboard without a plan is one of the biggest mistakes I see new store owners make. Before you even think about themes or product photos, you need a solid blueprint. This initial groundwork is what separates the stores that thrive from those that barely survive.

Your Blueprint for a Successful Shopify Store

A business workspace featuring a "STORE BLUEPRINT" folder, laptop, and charts for planning.

Think of this planning stage as your pre-flight checklist. Getting these details right from the start ensures every decision you make—from branding and design to your marketing spend—is deliberate and points you towards long-term success. Skipping this part is like building a house without foundations. Sure, it might look okay for a little while, but it won't stand up to any real pressure.

The e-commerce space in the UK is incredibly crowded. With over 209,000 live Shopify stores operating here (around 184,825 in England alone), you absolutely must have a clear strategy to cut through the noise. This is where a well-defined unique selling proposition becomes your greatest asset.

Defining Your Niche and Audience

Right, first things first: get specific. Vague ideas won't get you very far. Who, exactly, are you selling to? And what makes your products the right choice for them?

Don't just say "women's fashion." Instead, drill down to something like, "sustainably-made minimalist jewellery for professional women aged 25-40 in the UK." See the difference? That level of detail gives you a clear direction for everything else.

Once you know your audience inside and out, you can:

  • Refine your brand voice: You'll know how to speak their language, addressing their specific wants and worries.
  • Spend marketing money wisely: No more guessing. You can target your ads and content precisely where your customers hang out.
  • Build a better product catalogue: You'll stock items you know your ideal customer is looking for.

Analysing the Competition

With your niche locked in, it's time to see who's already playing in that sandpit. A bit of competitor analysis is essential. Just search for your main keywords and see which stores pop up. Pick the top 3-5 and do a deep dive. Look at their websites, check their pricing, see how they use social media, and read their customer reviews.

The goal here isn't to copy what they're doing. It's to spot the gaps. What aren't they doing well? What are customers complaining about? That's your opening.

A lot of people see competition and get discouraged. I see it as proof that there's money to be made. You don't need to be the only one in the market; you just need to be the best choice for a very specific customer.

Choosing the right platform is a foundational decision, and a detailed Shopify or WooCommerce comparison can be a huge help at this stage. And as you plan, don't forget that building a brand means building relationships. Understanding the advantages of email marketing from the outset will give you a powerful tool to connect directly with your customers and grow a sustainable business.

Building Your Store’s Foundation

With a solid plan in place, it’s time to roll up your sleeves and start building. This is where your idea stops being just notes on a page and starts to look like a real, functioning online shop. The first move is always the most practical one: creating your Shopify account and sorting out all the backend settings. These are the digital nuts and bolts that will keep your store running smoothly.

Trust me, getting these foundational bits right from the get-go will save you a world of headaches later on. It’s about more than just picking a cool store name; it's about properly setting up your business info, currency, and user permissions to build a stable and secure base for everything that comes next.

Signing Up and Picking a Shopify Plan

The sign-up process is pretty straightforward, but choosing the right plan is something you should give a bit of thought to. Shopify has a tiered structure designed to grow with your business, so whatever you choose now isn't a life sentence. You can always upgrade as your needs change.

For most new businesses here in the UK, the choice usually boils down to one of these three:

  • Basic Shopify: Perfect for start-ups and small businesses just getting off the ground. It gives you everything you need to launch a proper online store, take payments, and manage orders without a big upfront cost.
  • Shopify: This is the natural next step. It offers better reporting features and, importantly, lower transaction fees. It's a great fit for businesses that are starting to see some real growth and need a clearer picture of their performance.
  • Advanced Shopify: Best for established businesses with high sales volumes. You’ll get the lowest transaction fees and the most powerful reporting tools this side of Shopify Plus.

My advice? Don't overcommit right at the start. Kicking off with the Basic plan is often the smartest play. It keeps your costs down while you test your idea and start getting some momentum.

Nailing Your Core Store Settings

Once you’re logged into your new Shopify dashboard, you’ll be tempted to dive straight into the fun stuff like picking a theme. Resist that urge. The first, and most important, thing you need to do is head to Settings in the bottom-left corner and work your way through the core setup. So many new store owners skip this and end up tangled in problems later.

First up, under Store details, carefully fill out your business name, legal address, and contact information. This info pops up on invoices and email notifications, so getting it spot on is crucial for looking professional and building trust.

Next—and this is a big one for UK businesses—go to Store currency. Make absolutely sure this is set to Pound Sterling (GBP). Trying to change this after you've made your first sale is a massive pain, so it’s vital to lock it in from day one.

Think of these initial settings as pouring the concrete for your house. It’s not the most exciting part of the build, but if that foundation is wonky, everything you put on top will be unstable. Getting your currency and business details right is non-negotiable.

It’s also worth knowing just how big Shopify is in our neck of the woods. The platform is a major player in the UK, holding roughly 23% market share among e-commerce platforms. That means almost one in four online shops in the UK is powered by Shopify, which speaks volumes about its reliability and the strong ecosystem it offers merchants. You can dig deeper into Shopify's UK market statistics on Shoptrial.co.uk.

Finally, take a quick look at the Users and permissions section. Even if you’re a one-person show right now, it’s good to know how to add staff accounts for the future. You can give limited access to a freelancer, a virtual assistant, or a new hire without handing over the keys to the entire kingdom. It’s a simple but essential security step as your team grows.

Designing a Brand and Choosing Your Theme

Overhead view of a tablet displaying 'BRAND DESIGN' next to color palettes and design documents.

Think of your website's design as its first handshake. It’s the split-second first impression that can either build instant trust or send a potential customer packing before they’ve even seen your products. A great design doesn't just look good; it communicates who you are as a brand.

This is where your Shopify theme steps in. It’s so much more than just a lick of paint for your store—it’s the entire framework that defines how customers will experience your brand online. Honestly, picking the right one is one of the most critical decisions you'll make.

Making The Call: Free vs. Premium Themes

Right out of the gate, you'll face the classic dilemma: go for a free theme or invest in a premium one? There's no single "right" answer here. The best choice really boils down to your budget, your long-term goals, and what you need your site to do.

Free themes, like Shopify’s own Dawn or Sense, are brilliant starting points. They’re well-coded, mobile-friendly, and get regular updates and support directly from Shopify. If you're bootstrapping or have a small, focused product catalogue, a free theme is often more than enough to get a sharp, professional-looking store off the ground.

On the other hand, premium themes from the Shopify Theme Store usually come with a one-off cost, typically around £150-£300. For that investment, you're buying more advanced features, greater design flexibility, and often specialised functionality built for specific industries, like fashion or food and drink.

Pro Tip: Don't get seduced by a flashy demo store. Before you commit to any theme, find the "View stores" link on its page. Seeing how real businesses have customised it gives you a much better feel for its true potential and, just as importantly, its limitations.

To help you decide, let's look at how free and premium themes stack up.

Shopify Theme Selection Guide

Choosing a theme is a foundational step. This table breaks down the key differences to help you align your choice with your business needs.

Feature Free Themes (e.g., Dawn, Sense) Premium Themes (e.g., Impulse, Prestige)
Cost Completely free to install and use. One-time payment, usually £150-£300.
Features Core e-commerce functionality, solid but basic. Advanced features like mega menus, product filtering, and video sections.
Customisation Good customisation options, but less design flexibility. Extensive options for layout, colour, typography, and section types.
Support Supported directly by Shopify's excellent support team. Support is provided by the third-party theme developer.

Ultimately, if you’re launching a store with a huge inventory, the slick navigation and filtering in a premium theme can be worth its weight in gold. But for a smaller, niche brand, a clean and simple free theme might be the perfect canvas to let your products shine.

Mastering The Shopify Theme Editor

Once you’ve picked your theme, it’s time to make it yours. In your Shopify admin, go to Online Store > Themes and click the big Customise button. This opens the theme editor, which is your command centre for everything design-related.

Start with the essentials under Theme settings. This is where you’ll upload your logo and favicon, and lock in your brand’s colour palette and typography. Consistency is everything. Aim for two or three primary colours and a couple of clean, readable fonts that you’ll use everywhere.

Next, turn your attention to the homepage—it’s your most valuable digital real estate. Use the editor to add, remove, and shuffle sections around to tell a compelling story. A killer homepage should immediately answer three questions for any new visitor:

  1. Who are you? (Your brand and logo)
  2. What do you sell? (Clear product categories or featured items)
  3. Why should I buy from you? (Your unique value proposition or current offers)

Of course, a professional look goes beyond just picking colours. There’s a real art to it, and learning how to make your Shopify store look professional can give you some excellent pointers on visual branding.

Structuring Your Navigation For Success

Your navigation menu is the roadmap to your store. If people can’t find what they’re looking for quickly, they’ll just leave. Simple as that. Head over to Online Store > Navigation to set up your main and footer menus.

Keep your main menu clean and uncluttered. Focus on the most important destinations: "Shop," "About Us," "Contact." If you have a lot of product categories, use dropdown menus to keep things organised and prevent overwhelming your visitors.

Remember, your store is just one piece of a much larger puzzle. The design choices you make are deeply connected to your overall business strategy. To bring in the right customers, you’ll also need a solid marketing plan. If you're just starting, this beginner's guide to digital marketing is a fantastic resource to get you on the right track.

4. Adding Products and Organising Your Catalogue

Flat lay of a product catalog concept with a laptop displaying products, camera, bag, and tags.

Now that you've got a great-looking theme, your store is essentially a beautiful but empty canvas. It’s time to bring it to life by adding the most important part of your business: your products. This isn't just about data entry. It’s about building a digital shopping experience that guides your customers, answers their questions before they even ask, and ultimately convinces them to hit that "add to cart" button.

Think of your product catalogue as the engine driving your entire store. When it's well-organised and thoughtfully presented, shoppers can easily find what they're looking for and even stumble upon new items they didn't know they needed. Let's get into the nitty-gritty of creating product listings that actually sell.

Crafting the Perfect Product Page

Every single product page is a dedicated sales pitch. To make it work, you absolutely need three things: a compelling description, fantastic images, and crystal-clear data.

First up, the product title. It needs to be descriptive for both people and search engines. Don't just call it a "T-Shirt." A much better title would be something like, "Men's Organic Cotton Crew Neck T-Shirt in Navy Blue." This immediately tells a customer what it is and packs in keywords that will help you show up on Google.

Next, get to work on the product description. This is where so many people fall flat by just listing features. You need to sell the benefits. Selling a waterproof jacket? Don't just mention "Gore-Tex fabric." Explain how it keeps the wearer bone-dry during a torrential downpour, making their miserable commute surprisingly comfortable. Use short paragraphs and bullet points to break up the text and make it easy to scan.

Finally, your product photography is completely non-negotiable. Online shoppers can't touch or feel your products, so your images have to do all the heavy lifting. You need to invest in high-resolution photos from multiple angles, show the product in use, and if you can, include a video. It's the most powerful tool you have for building trust and driving sales.

Creating Product Variants and Inventory

Most products aren't one-size-fits-all. They come in different sizes, colours, or materials. This is where product variants come into play.

Within a single product listing, Shopify lets you create all the different options you offer. For instance, if you sell a jumper in three sizes (S, M, L) and two colours (Red, Blue), Shopify will automatically generate all six possible combinations for you. No manual work needed.

For each of these variants, you can set a unique:

  • Price: Want to charge a bit more for the premium material? No problem.
  • SKU (Stock Keeping Unit): This is a unique code that helps you track your stock accurately.
  • Inventory Quantity: Shopify will track stock levels for each specific variant.

Speaking of inventory, setting up tracking is a must. By enabling it, Shopify automatically updates your stock counts as sales come in, which is crucial for preventing the nightmare scenario of selling an item that's already out of stock.

An optimised product page does more than just inform—it converts. While the average Shopify store conversion rate hovers around 1.4%, the top performers achieve an impressive 4.7%. This huge gap highlights how critical it is to get your product presentation right. You can discover more insights about e-commerce performance benchmarks on Statista.com.

Using Collections to Organise Your Store

Imagine walking into a massive supermarket where everything is just dumped in random piles. Finding the milk would be an absolute nightmare. That's exactly what a store without collections feels like to a customer.

Collections are simply Shopify's way of grouping related products. They are the digital aisles of your shop.

You can create collections for just about anything:

  • Product types: "T-Shirts," "Mugs," "Skincare"
  • Specific audiences: "Gifts for Him," "New Arrivals"
  • Sales or promotions: "Summer Sale," "Clearance"

You have two ways to do this. With manual collections, you hand-pick every single product you want to include. The real power, though, lies in automated collections. You set the rules, and Shopify does the work. For example, you could create a collection that automatically pulls in any product with the tag "sale" and a price under £20.

Using collections properly transforms your store's navigation, making it incredibly easy for customers to browse and find what they want. It’s a fundamental part of building a user-friendly and successful Shopify website.

Configuring Payments, Shipping, and Taxes for UK Customers

Now that your digital shopfront is looking sharp and your products are in place, it’s time to tackle the operational machinery that makes everything tick. This is where we get into the nitty-gritty of getting paid, shipping orders, and handling taxes—the three pillars that transform your website from a pretty catalogue into a real, functioning business.

For UK customers, a transparent and straightforward checkout is absolutely non-negotiable. Nailing these details isn't just about logistics; it’s about building the trust that turns a one-time visitor into a loyal customer. This part of the process is less about creative flair and more about precision, so let's get it right.

Activating Your Payment Gateways

The simplest way to start taking money is by switching on Shopify Payments. It’s Shopify’s own payment processor, and frankly, it's a breeze to set up. It lets you accept all the major credit and debit cards right on your site, meaning customers never have to leave your domain to complete their purchase. That seamless experience can genuinely nudge your conversion rates in the right direction.

But don't stop there. So many UK shoppers have a deep-rooted trust in PayPal and actively look for that little blue button at checkout. Offering it alongside Shopify Payments covers your bases and caters to a huge group of buyers who love the security and speed of their PayPal account. You can connect your business PayPal account from the same 'Payments' settings page in your Shopify admin.

  • Shopify Payments: Your go-to, integrated solution for all card payments.
  • PayPal Express Checkout: A must-have for building trust and offering a familiar option.
  • Other Options: Consider adding gateways like Klarna or Clearpay. These ‘buy now, pay later’ services are incredibly popular in the UK and can be a fantastic way to encourage a higher average spend.

Setting Up Sensible Shipping Rules

Shipping is the one area where I see new store owners tie themselves in knots. My advice? Keep it simple, at least to start with. Head over to Settings > Shipping and delivery in your Shopify admin. This is where you’ll create your shipping zones, which are just the geographical areas you’re willing to post to.

For most new UK businesses, two zones will be plenty:

  1. United Kingdom: Create this one first. You can then add a simple flat-rate shipping fee (say, £3.95 for standard delivery). Even better, offer free shipping on orders over a certain amount, like £50. It’s a classic, powerful incentive that encourages customers to add that one extra item to their basket.
  2. International: If you're feeling ambitious and want to sell abroad, you can set up separate zones for Europe, the USA, and the rest of the world, each with its own pricing structure.

As you grow, you can integrate directly with UK carriers like Royal Mail or Evri. There are plenty of apps on the Shopify App Store that connect your store to these services, letting you print shipping labels directly and automatically send tracking information to your customers. It's a game-changer for efficiency.

Setting clear and fair shipping costs is absolutely vital. Unexpectedly high shipping fees are the number one killer of online sales. Be completely upfront about your delivery costs from the very beginning to avoid that last-minute frustration that makes people abandon their carts.

Navigating UK VAT Correctly

And finally, let’s talk tax. For any UK business, this means getting your head around Value Added Tax (VAT). It sounds intimidating, I know, but Shopify really does take the pain out of the technical side.

First things first, you need to work out if you even need to register for VAT. In the UK, you are only legally required to register if your VAT-taxable turnover tips over £85,000 within a 12-month period. If your sales are below this threshold, you don’t have to worry about charging VAT.

If you are VAT-registered, go to Settings > Taxes and duties. You can pop your VAT registration number in here, and Shopify will automatically calculate and add the correct VAT (currently 20% on most goods) for your UK customers at checkout. It ensures you stay compliant and makes your bookkeeping infinitely cleaner. Trust me, getting this right from day one will save you a world of headaches later on.

Your Pre-Launch Checklist and Growth Plan

https://www.youtube.com/embed/tc1ou-8OTuc

You've loaded your products, dialled in your theme, and configured your settings. The finish line is so close you can almost taste it. But before you flip the switch and tell the world about your new store, it's time for one last, incredibly important quality check.

This is the moment to catch the small mistakes that can leave a big, negative impression on your very first customers. I’ve seen so many new store owners rush this part, only to spend their launch week dealing with frustrated emails about broken links or confusing checkout steps. Don't let that be you. A meticulous final review ensures the entire customer journey is smooth, from the second they land on your site to the moment they get that order confirmation email.

The Final Checks Before Liftoff

Put on your most critical customer hat. Your goal here is to try and break things, to find any little snag in the experience before a real buyer does.

Here's a practical checklist I run through with every new store:

  • Place a Test Order: This is non-negotiable. Use Shopify's Bogus Gateway to simulate a full transaction. Add something to your basket, head to checkout, fill in your details, and complete the purchase. This is the quickest way to find out if there's a problem with your payment or shipping rules.
  • Confirm Mobile Usability: Grab your phone and go through your entire site. Seriously, every page. Can you read the text easily? Are the buttons big enough to tap without zooming? With well over 50% of ecommerce traffic now coming from mobile, a clunky mobile experience just isn't an option anymore.
  • Proofread Everything: Read every single page, product description, policy document, and even the text on your buttons. Typos and grammar mistakes instantly look unprofessional and can chip away at a customer's trust before they've even considered buying.

Your launch is your one chance to make a fantastic first impression. Taking an extra day to test everything is far better than spending your first week apologising to customers for a broken website.

This flowchart maps out the key operational steps—payments, shipping, and taxes—that absolutely must be flawless before you launch your UK store.

Flowchart illustrating the UK store setup process with icons for payments, shipping, and taxes (VAT).

It really highlights how each piece of your backend setup directly impacts the customer's experience at checkout, which is why it's such a critical part of your pre-launch testing.

Removing the Password and Going Live

Once you've ticked every box on your list and you're confident everything works perfectly, it's time for the big moment. First, make sure you've connected your custom domain under Settings > Domains to give your store that professional, branded look.

Next, navigate to Online Store > Preferences. Scroll down to the "Password protection" section, uncheck the box, and hit save. And just like that, your Shopify website is live and open for business.

Of course, going live is the starting line, not the finish. Your focus now pivots from building to growing. The very first thing you should do is install Google Analytics to start tracking visitor data—it's absolutely essential for understanding how people interact with your site. You should also get your email newsletter sign-up form ready to go, so you can start building an audience you actually own.

Having a solid plan for what comes next is crucial. For a great starting point, check out this guide to creating a marketing strategy for small business to make sure you hit the ground running.

Your Top Questions, Answered

Getting started with a new platform always brings up a few questions. I've been there! Here are the answers to some of the most common things people ask when they're learning how to build a Shopify website for the first time.

How Much Does It Really Cost to Build a Shopify Website in the UK?

This is the big one, and the honest answer is: it depends. You can get started on a shoestring, but costs can climb depending on your ambition.

Let's break down the typical expenses. Your baseline is the monthly Shopify plan, which kicks off at about £25 per month for the Basic plan. From there, you might have:

  • A Premium Theme: Free themes are a great starting point, but if you want more features or a specific aesthetic, a premium theme is a one-off purchase, usually setting you back £150-£300.
  • Your Domain Name: Securing your own .co.uk or .com is essential for branding. Budget around £15 per year for this.
  • Monthly App Costs: This is the most variable expense. A few key apps for email marketing or customer reviews could add anywhere from £10 to over £100 a month to your bill.

So, while you can launch a solid, do-it-yourself store for a couple of hundred pounds to cover the theme and initial setup, a professionally designed site with all the bells and whistles can easily run into the thousands.

Can I Actually Build a Shopify Site Myself Without Knowing How to Code?

Yes, one hundred percent. This is precisely what Shopify was built for. It’s designed from the ground up to empower founders who aren't developers.

You'll spend most of your time in the theme editor, which is a visual, drag-and-drop interface. It makes customising your layout and colours incredibly straightforward.

From adding your products and designing the homepage to fulfilling your first orders, you can manage every critical aspect of your business without ever touching a line of code.

Realistically, How Long Does It Take to Build a Shopify Website?

The timeline hinges entirely on how prepared you are before you start.

If you’ve done your homework and have all your product photos, descriptions, and page copy written and ready to go, you could genuinely get a simple, functional store live over a weekend. It's totally achievable.

However, for a store with a large number of products, more complex customisation, and several app integrations, you'll need a bit more time. I'd recommend setting aside anywhere from one to four weeks to give yourself enough space to build, test everything thoroughly, and feel confident before you hit that launch button.


Ready to start growing your new store? Find all the essential tools and resources you need in one place. Explore The Digital Marketing Toolbox and build your marketing stack with confidence: https://grow-your-biz.com

admin
Author: admin