
Putting a Google Calendar on your website is a surprisingly simple way to share live schedules, upcoming events, and your availability. It quickly turns a static page into an interactive hub, saving you from tedious admin and giving your visitors a reason to stick around.
Why a Live Calendar Is a Game-Changer for Your Website
Adding a live calendar is about more than just showing a list of dates. It's about creating a dynamic, genuinely useful experience for your visitors that works for your business around the clock. You're essentially bridging the gap between your real-world activities and your online presence, giving people the most current information right away.
This one simple feature can automate tasks that eat up so much time, like answering calls about business hours or manually confirming bookings. Your audience gets the answers they need instantly, without having to ask.
More Engagement, Less Hassle
Think about it: when someone lands on your site, any small obstacle can be enough to make them leave. A basic "Contact Us" page for booking enquiries creates unnecessary back-and-forth. An embedded Google Calendar, on the other hand, shows your availability in real-time and cuts out all that friction.
Here are a few real-world examples I've seen work brilliantly:
- A local yoga studio shows its full weekly class schedule, so members can see what's on and plan their week without leaving the site.
- A consultant displays their open appointment slots, letting potential clients book a meeting on the spot. No more email tennis trying to find a time that works.
- An online shop builds hype by showing its upcoming flash sales and product launches right on the homepage.
In every case, the calendar isn't just a timetable; it's an interactive tool that invites people to do something, not just look. That transparency builds trust and makes your business feel organised and approachable.
A Proven Tool for UK Businesses
This isn't just a neat idea—it's a proven strategy. Across the UK, a whopping 18,962 websites have the Google Calendar widget embedded, making it a trusted choice for businesses wanting to get organised. Even better, data from BuiltWith's trend reports shows that UK sites with these widgets see 15-20% higher visitor interaction times. People actually stick around to check what's going on.
This is exactly the kind of interaction that turns a casual visitor into a warm lead. By giving people clear, actionable information, you smooth out their journey and make it much more likely they'll book that class, schedule that consultation, or make that purchase.
To help you see the bigger picture, here's a quick breakdown of how this simple integration can pay off.
Key Benefits of Website Calendar Integration
| Benefit | Impact on Your Business | Ideal For |
|---|---|---|
| Time Savings | Reduces manual scheduling and back-and-forth communication. | Service providers, consultants, and class-based businesses. |
| Improved User Experience | Provides instant access to schedules and availability, reducing user frustration. | Any business where appointments or events are central. |
| Increased Engagement | Encourages visitors to interact with your site, increasing time on page. | Community hubs, event organisers, and e-commerce stores. |
| Enhanced Credibility | A public, well-maintained calendar builds trust and shows you're organised. | Small businesses, freelancers, and educational institutions. |
Ultimately, a calendar creates a clear, direct path for your customers to follow.
By making your schedule transparent and interactive, you’re not just sharing dates; you're inviting customers to become an active part of your business's rhythm. It's a simple change that shifts the user from observer to participant.
Integrating a Google Calendar on your website is one of the most effective, low-effort ways to make your digital presence more helpful. If you're curious about similar tools, it's worth learning more about what are widgets for websites and the different ways they can improve your site.
Getting Your Google Calendar Live with the Official Embed Method
The quickest and most direct way to get a Google Calendar onto your website is by using Google's own built-in embed feature. This isn't some complex integration; it simply uses an iframe—a small snippet of HTML code that acts like a window on your site, displaying your live calendar. It’s the go-to starting point because it's reliable, requires zero special software, and just works.
But before you can show your calendar to the world, you first have to give it permission to be seen. This is probably the most common stumbling block, but it's crucial for making sure your visitors can see your events without you accidentally sharing your entire Google account.
First Things First: Adjusting Your Calendar’s Sharing Permissions
By default, every Google Calendar you create is private. That’s a good thing, especially for your personal schedules. To embed a calendar, you need to deliberately make that specific calendar public. Don't worry, this doesn't expose all your private appointments; you have total control over which calendar becomes visible.
Head over to your Google Calendar settings. On the left, find the calendar you want to share, click the three-dot menu next to it, and choose “Settings and sharing.”
Now, you just need to tweak the access permissions.
- Make available to public: You absolutely must tick this box. Think of it as the master switch that allows anyone to view the calendar.
- See all event details: This is what you’ll want for most public-facing schedules, like a list of community events or a workshop timetable. Visitors will see the event titles and any details you've added.
- See only free/busy (hide details): This is a brilliant option for consultants or service-based businesses. It shows people when you're booked up without revealing what you're actually doing. It’s all about showing availability, not personal details.
Getting this setting right is key to balancing transparency with privacy. For a public events calendar, show everything. For a personal availability calendar, hiding the details is the way to go.
Here's what that "Access permissions for events" section looks like inside your Google Calendar settings. This is where you'll be making these critical changes.
As you can see, the screenshot clearly shows the checkbox to "Make available to public" and the dropdown menu to control exactly how much detail your visitors can see.
Customising the Look and Feel
With your permissions sorted, it's time to generate the actual embed code. The good news is that Google gives you a simple customisation tool to tweak how the calendar will look on your site before you even touch a line of code.
This panel lets you control a few important visual elements right from the get-go. For instance, you can select which of your now-public calendars to bundle into a single view. This is incredibly handy if you want to merge, say, an "Upcoming Workshops" calendar and a "Public Holidays" calendar into one display for your visitors.
You can also set the default view that makes the most sense for your audience.
- Month view: Perfect for giving a broad overview of what’s coming up.
- Week view: Works really well for more detailed weekly schedules, like a fitness studio’s class list.
- Agenda view: My personal favourite for a clean, list-style format that’s great for highlighting a series of upcoming events.
You can also make a few basic tweaks to the colour scheme, title, and a couple of other display options. While the customisation is limited, it’s often more than enough for a clean, functional integration. Once you understand the 'why,' you'll be ready to explore the easiest way to add a booking calendar to your service website, building upon these foundational steps.
Remember, the goal of the official embed method is simplicity and speed. You are trading deep customisation for a reliable, no-fuss solution that works straight out of the box. It’s the perfect method for getting your schedule online quickly.
Dropping the Code Into Your Website
After you’ve tweaked the appearance, Google will present you with an iframe HTML snippet. This is the code you’ll copy and paste directly into your website. The process is pretty much the same across any modern website builder, whether you’re using WordPress, Shopify, or Squarespace.
You’ll just need to find the option to add custom HTML, a code block, or an embed widget on the page where you want the calendar to live. Paste the code you copied from Google Calendar into that block, hit save, and you're done.
When you preview the page, you should see your live, interactive Google Calendar. The best part? Any updates you make in your actual Google Calendar will now automatically show up on your website, so your visitors always have the most current information without you having to lift a finger.
Custom Styling to Match Your Brand Identity
Let’s be honest, the standard Google Calendar embed does the job, but it rarely looks great straight out of the box. Its default blue-and-grey theme can stick out like a sore thumb on a website with a carefully crafted brand aesthetic. It feels functional, but a little… generic.
Fortunately, you’re not stuck with it. With a few targeted CSS tweaks, you can make that calendar look like it was custom-built for your site. We're not talking about a complete coding overhaul, just small, strategic changes to colours, borders, and spacing that make a huge difference.
Making Your Embedded Calendar Responsive
One of the biggest headaches with the default embed code is that it’s not responsive. The iframe is given a fixed width and height, which might look fine on your desktop, but it often breaks the layout or forces clunky horizontal scrolling on a mobile phone. A poor mobile experience is a sure-fire way to frustrate visitors and can even ding your SEO performance.
The best way to tackle this is by wrapping the iframe in a container <div> and applying a bit of CSS to make it fluid. This popular technique ensures your calendar scales beautifully on any screen, from a wide monitor right down to a smartphone.
Here’s a tried-and-tested solution you can drop right into your project:
- First, wrap your iframe code in a
<div>and give it a class, something likecalendar-container. - Then, add the following CSS to your site’s stylesheet.
.calendar-container {
position: relative;
padding-bottom: 75%; /* This sets a 4:3 aspect ratio */
height: 0;
overflow: hidden;
}
.calendar-container iframe {
position: absolute;
top: 0;
left: 0;
width: 100%;
height: 100%;
border: 0;
}
This simple snippet forces the iframe to maintain a consistent aspect ratio while filling 100% of the width of its parent container. Problem solved.
Simple CSS Tricks for a Branded Look
While security restrictions prevent you from styling the internal elements of the Google Calendar iframe directly, you have full control over its frame and how it sits within your page. This is where you can make some simple but effective changes.
Here are a few ideas to get you started:
- Customise the Border: The standard iframe often has a thin border. You can change its colour to match your brand palette or just remove it completely for a cleaner, more integrated look.
- Add a Box Shadow: A subtle shadow can lift the calendar off the page, giving your design a more modern, layered feel.
- Control the Margins: Give the calendar some breathing room by adding margins. This prevents it from feeling crammed up against other elements on the page.
Think of the iframe as a picture and its container as the frame. You can’t change the picture itself, but a well-chosen frame can make it blend perfectly with the room's decor. That’s exactly what we’re doing here.
Matching Fonts and Colours
To achieve a truly seamless look, you'll want the calendar to reflect your site's typography and colour scheme. Direct font styling inside the iframe is a no-go, but you can set a primary colour using Google Calendar’s own embed generator.
Before you copy the embed code, find the customisation options. You’ll see a field for an "Accent colour". Simply grab the hexadecimal colour code from your brand guidelines and paste it in there. This small step will change the calendar’s header and other key highlights, giving you a quick visual win.
It's these small details that build a professional, trustworthy online presence. By paying attention to styling, you can elevate the Google Calendar on your website from a generic add-on to a polished, integral part of the user experience.
Using Plugins and Widgets for Advanced Features
The basic iframe embed gets the job done, but let's be honest—it’s a bit vanilla. What if you need more? What if you want your calendar to truly match your brand's aesthetic, let visitors filter events, or even book appointments on the spot? This is exactly where third-party plugins and widgets shine, giving you a serious upgrade without needing to touch a line of code.
These tools are built to bridge the gap between Google's default functionality and a fully polished, interactive calendar experience. They're especially handy if you're on a platform like WordPress or Shopify, where dedicated apps can be installed and configured in minutes.
Think of the standard embed as a functional, off-the-shelf window. A plugin, on the other hand, is like commissioning a custom-built bay window with stained glass and built-in seating. It serves the same core purpose but elevates the style, comfort, and functionality tenfold.
Why Choose a Third-Party Tool?
The biggest win with a plugin is the immediate boost in both looks and features. Tools from providers like Tockify or Elfsight are designed with user experience at their core, offering slick, professional templates right out of the box. Instead of fighting with custom CSS to tweak colours and fonts, you get a simple dashboard to customise everything.
But the control you get goes way beyond just aesthetics. Here are some of the advanced features you can usually tap into:
- Beautiful Layouts: Choose from a whole library of designs, like grids, lists, carousels, and agenda views that are fully responsive from the get-go.
- Advanced Filtering: Let your visitors filter events by category, date, or custom tags. This is a game-changer for a community centre listing different classes or a business promoting multiple event types.
- Direct Booking and Ticketing: Many widgets integrate with payment gateways, so you can sell tickets or take bookings directly from the calendar itself.
- Social Sharing and SEO: Good plugins are often built with search engines in mind and include easy social sharing options to help your events get more visibility.
And it doesn't stop at simple embeds. A whole ecosystem of tools can turn your Google Calendar into a productivity machine. For example, exploring the top tools and add-ons for Google Calendar time tracking can unlock powerful functionalities that work perfectly alongside your website integration.
To make things clearer, let's compare the standard embed with a dedicated plugin.
Comparing Calendar Integration Methods
| Feature | Standard Google Embed (Iframe) | Third-Party Plugin/Widget |
|---|---|---|
| Customisation | Very limited (basic colour, size, view). Requires CSS for more. | Extensive. Pre-built templates, custom fonts, colours, and layouts. |
| User Interaction | Passive viewing only. No filtering or booking capabilities. | Highly interactive. Advanced filtering, search, and direct booking. |
| Ease of Use | Simple copy-paste, but styling is complex for non-developers. | Intuitive dashboard. No coding required for a professional look. |
| Responsiveness | Basic responsiveness can be tricky to perfect on all devices. | Fully responsive by design, looks great on mobile and desktop. |
| Advanced Features | None. No ticketing, payment integration, or social sharing. | Often includes ticketing, payments, SEO features, and social sharing. |
Ultimately, while the iframe is a quick and free solution, a third-party widget offers a far more professional and engaging experience for your visitors.
Elevating the User Experience
The real magic of a plugin is the superior experience it creates for your audience. When a Google Calendar on a website is genuinely useful and engaging, people stick around. In fact, data shows users spend an average of 6 minutes and 25 seconds per session on Google Calendar's web version—that's a huge amount of time, signalling that people are willing to dive deep into a schedule to find what they need.
A well-chosen plugin taps into this behaviour by making your on-site calendar just as intuitive and powerful. When someone can easily filter events to find a yoga class or book a consultation without leaving your page, they're far more likely to take that next step. If you're looking for more ways to enhance your site, our guide on how to add widgets to your website has some great ideas.
Using a dedicated widget isn't just about making your calendar look pretty. It's a strategic decision to reduce friction, provide more value to your visitors, and ultimately, drive more conversions by making your schedule an interactive centrepiece of your site.
The key is to pick the right tool for the job. If your goal is purely aesthetic, a simple styling widget will do. But if you want to turn your calendar into a booking engine, look for options with those deeper integrations. This focused approach ensures you get the most bang for your buck while delivering a polished and powerful feature for your visitors.
Building a Custom Solution with the Google Calendar API
When a simple iframe embed or a third-party plugin just won’t cut it, it’s time to roll up your sleeves. For complete control over how your calendar looks and functions, the Google Calendar API is your best bet. This is the path for anyone needing more than just a basic display—it’s for building custom interactions and workflows tied directly to your schedule.
Using the API lets you move far beyond just showing a calendar. Imagine creating a custom booking system that doesn't just display your availability but actively writes new appointments straight back to your Google Calendar. You could pull event data and display it in a completely bespoke layout, like a branded timeline or a dynamic event slider on your homepage.
This level of integration is what separates a standard website from a powerful business tool. You’re essentially creating a seamless, two-way street where your website and calendar are in constant communication, automating tasks and enriching the user experience in ways an iframe never could.
Understanding the API and Its Potential
At its core, an API (Application Programming Interface) is just a set of rules that lets different software applications talk to each other. The Google Calendar API is what allows your website's code to securely access and manipulate your calendar data.
This unlocks a world of possibilities for creating a custom Google calendar on your website:
- Custom Event Displays: You can pull specific event details and showcase them in any format you can dream up. Think a minimalist list, an interactive map of event locations, or a feed that perfectly matches your site's unique design.
- Two-Way Synchronisation: How about a system where users can submit events through a form on your website? These could then be automatically added to your Google Calendar, maybe with an approval step built in.
- Integration with Other Systems: You can sync your calendar events with other business tools, like a CRM or a project management app. This is fantastic for automating workflows and keeping all your platforms up to date without manual entry.
This infographic shows the journey from a simple integration to a more advanced, API-driven solution.
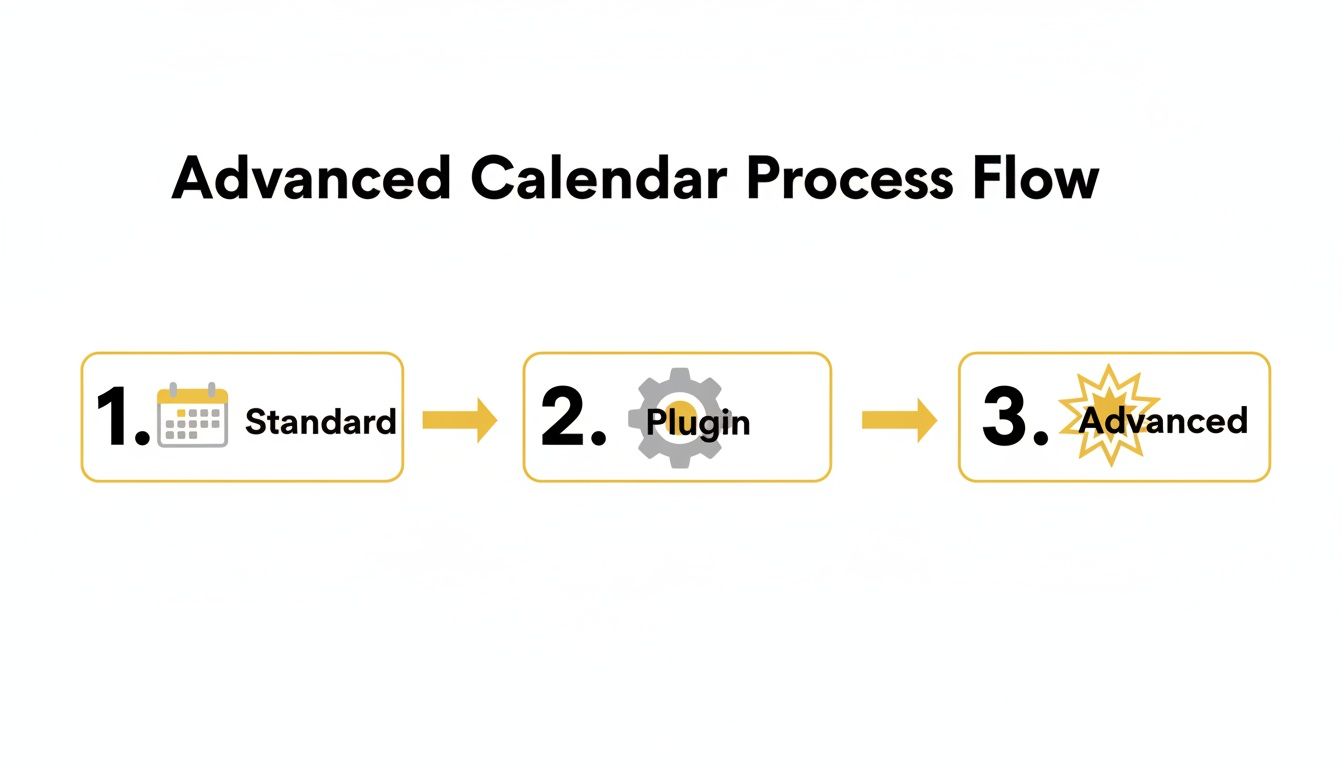
As you can see, each step builds on the last, moving from a simple display to interactive functionality and finally to a full, custom integration with the API.
Getting Started with the Google Calendar API
Diving into the API definitely requires a more technical approach, but getting set up is surprisingly straightforward. Before you can write a single line of code, you need to tell Google about your project and get the right credentials to make authorised requests.
Your first stop is the Google Cloud Platform (GCP). This is the central hub where you'll manage all your API-related activities.
- Create a New Project: Inside your GCP console, you'll need to create a new project. Think of this as a dedicated workspace for your website's calendar integration.
- Enable the Google Calendar API: APIs aren't active by default, so you'll need to search for the "Google Calendar API" in the API Library and flick the switch to enable it for your project.
- Generate API Credentials: To make secure requests, you'll need an API key, which is a unique string that identifies your project. For any actions that actually modify calendar data, you'll also need to set up OAuth 2.0 consent. This is how you get permission from a user to access their data securely.
Your API key is the ticket to read public calendar data, but OAuth 2.0 is the key to the kingdom. It allows your application to create, modify, or delete events on a user's behalf—with their explicit permission, of course.
A Practical JavaScript Example
While building a full-blown application is a bit beyond our scope here, let’s look at a simple example. Here's how you could use JavaScript to fetch and display your next five upcoming events from a public calendar.
Once you have your API key and the public calendar ID, you can use JavaScript's fetch function to retrieve the data. You’d then parse the JSON response and loop through the events, displaying their titles and start times in a simple list on your webpage. Mastering this is the first step toward building much more complex displays. For those interested in creating custom site elements, learning how to make widgets offers a great parallel path to understanding modular web design.
The API truly opens up a new frontier for customisation. It gives you the power to craft a bespoke calendar solution that aligns perfectly with your business goals and provides a rich, interactive experience for your users.
Frequently Asked Questions About Website Calendar Integration
Even with the best guide, you’re likely to have a few questions or hit a small snag when you add a Google Calendar to your website. I’ve put this section together to tackle the most common issues I see people run into, giving you clear, straightforward answers to get your calendar looking and working just right.
Let's get into the nitty-gritty details that often pop up. We'll cover everything from juggling multiple schedules to making sure your private appointments stay private.
Can I Display Multiple Google Calendars at Once?
You absolutely can, and it's one of the best features of the standard embed method. You can easily merge several public calendars into a single, colour-coded view right on your website.
Think of a community centre, for instance. They could show separate calendars for "Workshops," "Club Meetings," and "Public Events" all in one convenient place.
Setting this up is simple. Head back to the "Integrate calendar" section in your Google Calendar settings. In the customisation area, you’ll find a list of all your calendars. Just tick the boxes next to the ones you want to show, and Google will generate the combined iframe code for you.
Will My Private Events Show Up on the Website?
Absolutely not, as long as you've got your permissions set up correctly. The visibility of your events is controlled by the sharing settings of the individual calendar itself, not your entire Google account.
Only the events on calendars you have specifically set to "Make available to public" will ever be visible on your website. Any personal calendars you keep private will remain completely hidden from your visitors. This separation is key to sharing what you need to without compromising your privacy.
My go-to advice is to create a brand new, dedicated Google Calendar just for your website. This creates a foolproof wall between your public schedule and your private life, completely removing any risk of accidentally sharing something you shouldn't.
Using a separate calendar for this purpose gives you total peace of mind.
How Do I Make My Embedded Calendar Mobile-Friendly?
This is a classic problem. The default iframe code Google provides isn't responsive out of the box, and it can really mess up your layout on smaller screens. The most reliable fix involves a little bit of CSS.
The best way to handle this is to wrap the <iframe> tag in a container <div> and apply some specific CSS to that container. This forces the iframe to scale correctly, maintaining its aspect ratio as it adjusts to the screen's width. I shared a copy-and-paste code snippet for this in the Custom Styling to Match Your Brand Identity section earlier. It's a small tweak, but it makes a huge difference to the user experience.
Do Visitors Need a Google Account to See My Calendar?
Nope. Your website visitors don't need a Google account at all. As long as your calendar's permissions are set to public, anyone who lands on your page can see your events. The calendar is displayed directly on your site, so there’s no login or authentication needed on their end.
This frictionless access is a massive plus. It means your schedule is available to the widest possible audience—from potential clients to community members—without putting any annoying barriers in their way. Your Google calendar on the website essentially becomes a public noticeboard that’s open for everyone to see.
At The Digital Marketing Toolbox, we specialise in connecting businesses with the best tools to improve their online presence and efficiency. From website widgets to powerful automation platforms, our curated catalog helps you find the right solutions for sustainable growth. Explore our resources today at https://grow-your-biz.com.


